

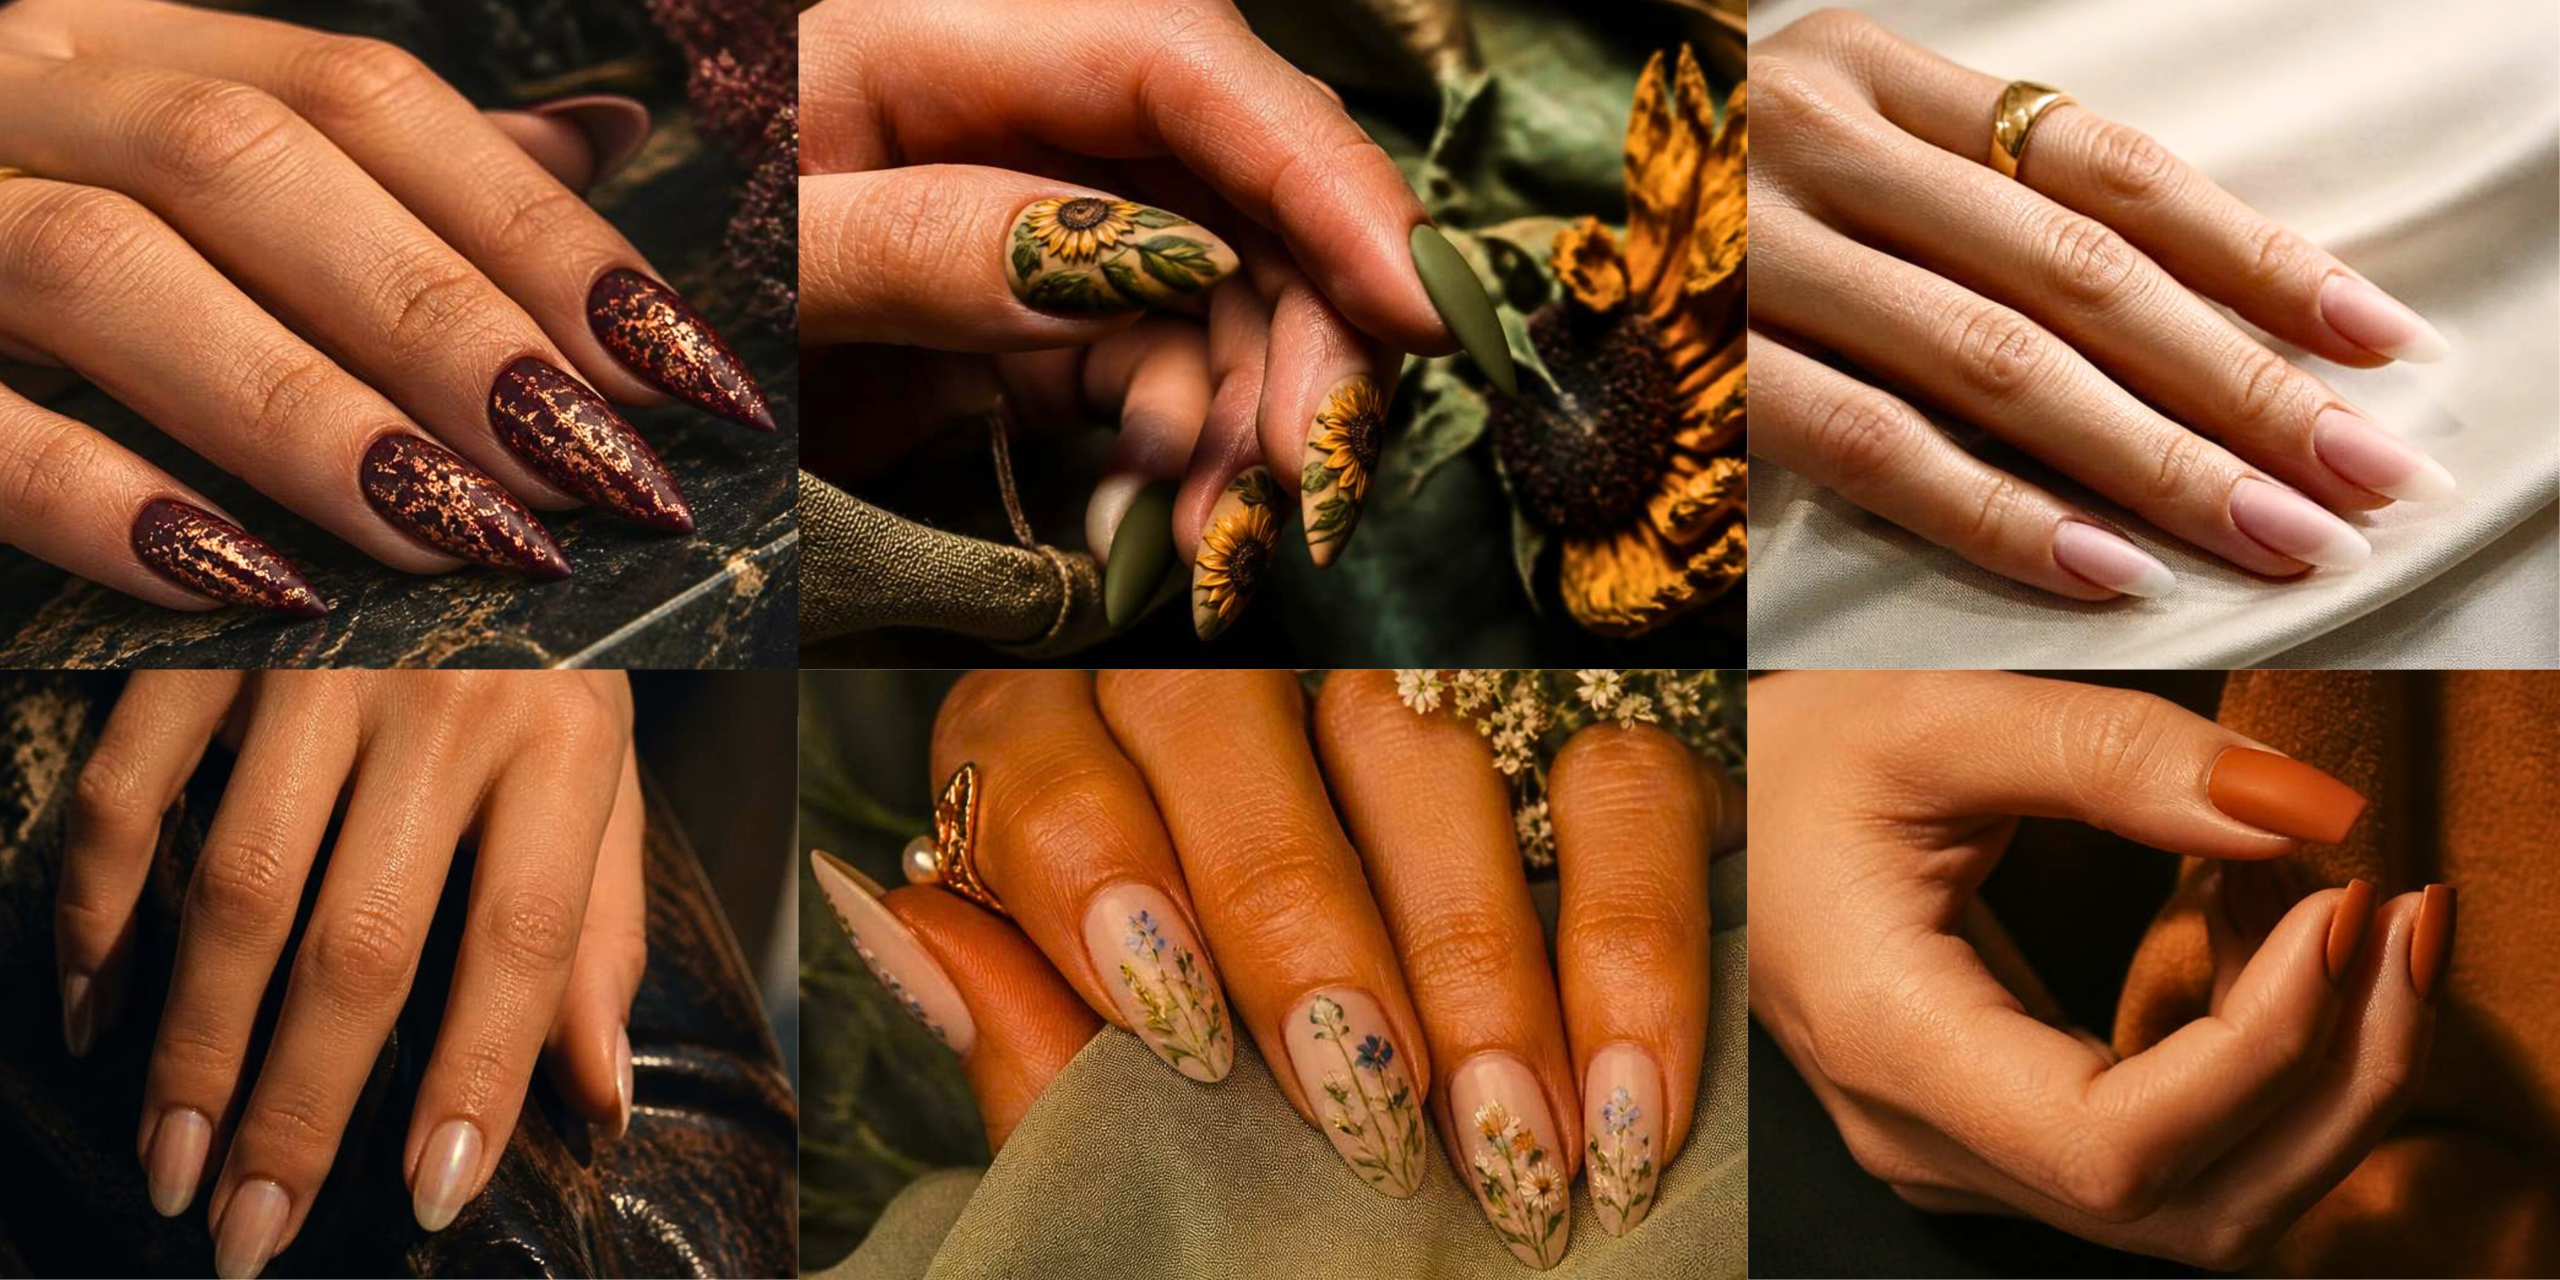
Quick Pick: Find Your Look in 30 Seconds
Short on time? Skip to your match:
- Beginner + 20 mins: Glazed Donut, Clean Girl Sheer Pink, Terracotta Matte
- Intermediate + 40 mins: Coral Ombre, Abstract Sun, French Tip Twist
- Statement + 60 mins: Sunflower Detail, Burgundy Gold Foil, Cottagecore Floral
Why These Nail Trends Dominate 2026
Late summer nails bridge summer and fall. They favor warm tones. They balance casual wear with intentional design. Pinterest data shows a 10,000% monthly increase in saves for warm-toned nail content. This guide gives you the 10 most-saved looks of 2026. Each includes step-by-step instructions. Each includes product links. Each includes difficulty level and time estimate.
You do not need salon skills. You need clear steps. You need the right products. You need realistic expectations. This guide provides all three.
Look 1: Late Summer Coral Ombre
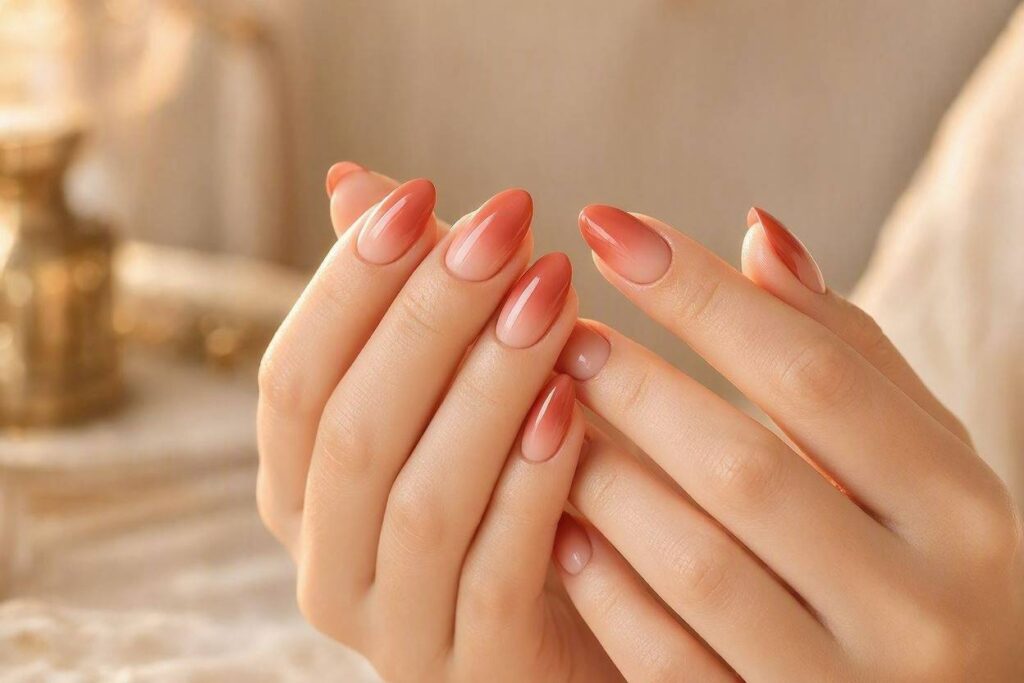
Difficulty: Intermediate | Time: 45 minutes | Best for: Medium to long nails
Coral ombre blends deeper tones at the cuticle with lighter shades at the tip. The result is a soft gradient that catches light beautifully.
What You Need
- Base coat
- Light coral polish (foundation shade)
- Deeper coral or burnt orange polish (gradient shade)
- Makeup sponge
- Small cleanup brush
- High-gloss top coat
- OPI Coral Nail Polish Set
3-Step Application
- Apply base coat. Paint entire nail with light coral. Let dry 2 minutes.
- Dab deeper coral onto makeup sponge. Press gently onto nail tip. Blend upward with light tapping motions. Repeat 2-3 times for intensity.
- Clean edges with small brush + polish remover. Seal with glossy top coat.
Pro Tip: Work one nail at a time. Sponging requires wet polish for smooth blending.
️ Avoid: Rubbing the sponge. This creates streaks. Tap only.
Look 2: Glazed Donut Finish with Gold Shimmer
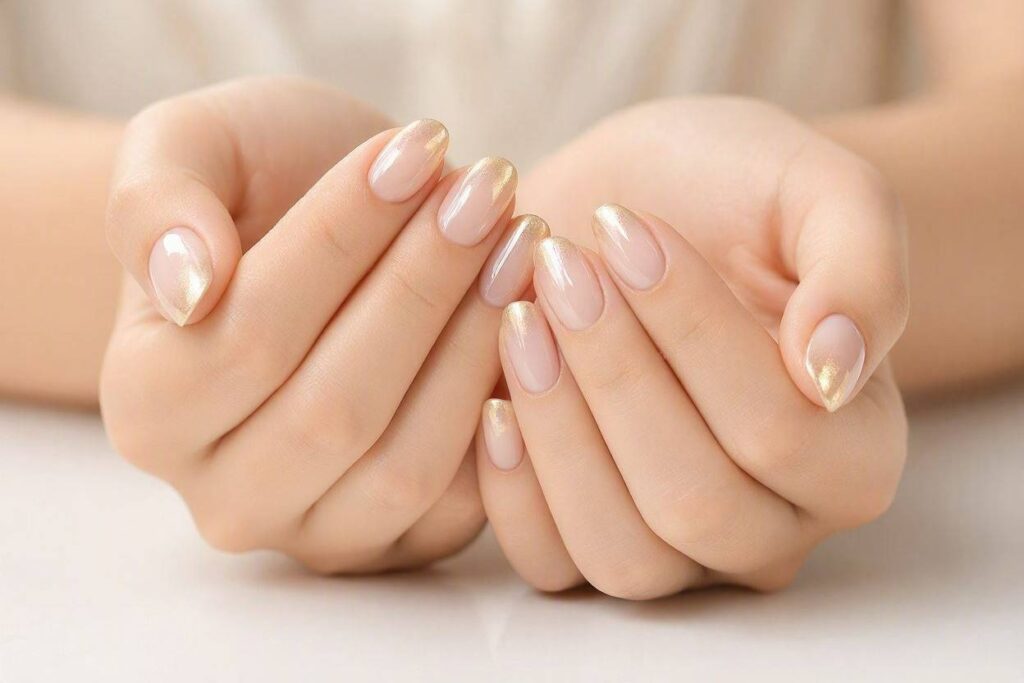
Difficulty: Beginner | Time: 20 minutes | Best for: All nail lengths
This sheer, luminous finish creates a glossy, reflective surface. Gold shimmer adds dimension without heavy pigment.
What You Need
- Clear base coat
- Sheer nude or pale pink polish
- Translucent gold shimmer powder or chrome powder
- Soft eyeshadow applicator
- No-wipe gel top coat or high-shine regular top coat
- Gel Top Coat for Long-Lasting Shine
3-Step Application
- Apply base coat. Add one thin coat of sheer nude. Let dry completely.
- Buff gold shimmer powder over nail using circular motions with soft applicator.
- Seal immediately with top coat to lock in reflectivity.
Pro Tip: Apply top coat in one smooth stroke. Going back creates streaks.
️ Avoid: Touching nails after powder application. Oils from skin reduce shine.
Look 3: Abstract Sun Design on Nude Base
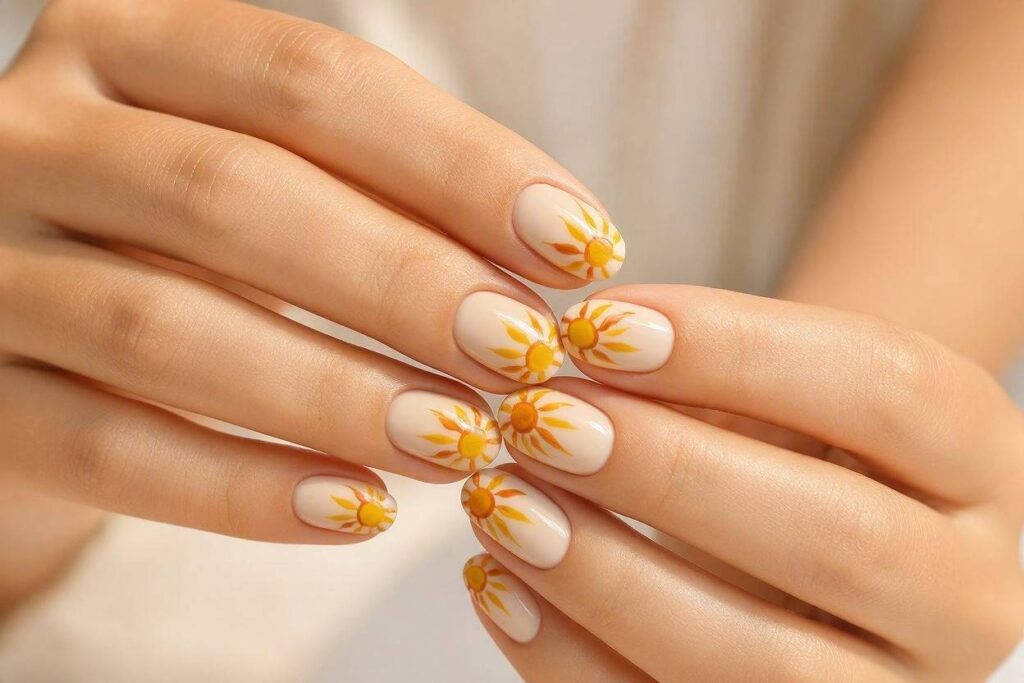
Difficulty: Intermediate | Time: 40 minutes | Best for: Accent nails or full set
Abstract sun motifs combine yellow and orange on a neutral base. The asymmetrical design feels modern and hand-painted.
What You Need
- Nude or cream base polish
- Yellow and orange polishes for sun rays
- Fine nail art brush or dotting tool
- Quick-dry top coat
- Nail Art Brush Set for Precision
3-Step Application
- Apply two thin coats of nude base. Let dry completely between coats.
- Using fine brush, paint irregular sun rays from one corner. Alternate yellow and orange.
- Keep design imperfect. Seal with quick-dry top coat.
Pro Tip: Practice rays on paper first. This builds confidence before nail application.
Avoid: Overcrowding short nails. Place sun design on 1-2 accent nails only.
Look 4: French Tip with Colored Edge
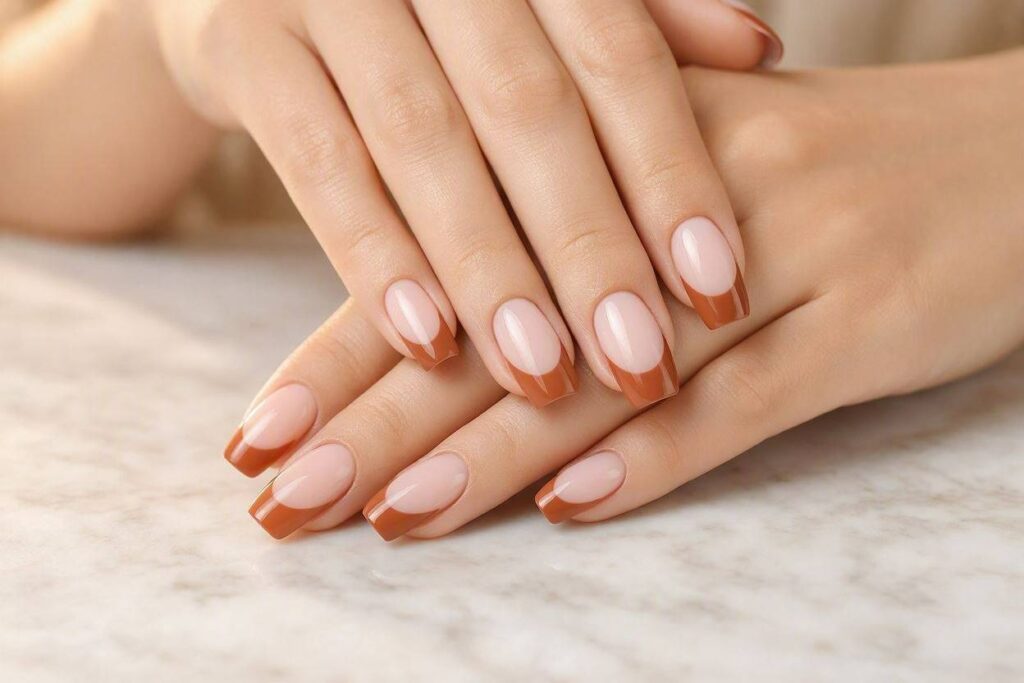
Difficulty: Beginner-Intermediate | Time: 30 minutes | Best for: Professional settings
Classic French manicure updated with warm-toned tips: terracotta, rust, or soft brown.
What You Need
- Sheer nude or pale pink base polish
- Terracotta, rust, or warm brown polish for tips
- French tip guides OR small angled brush
- Glossy top coat
- OPI Nail Polish Sets
3-Step Application
- Apply sheer base across entire nail. Let dry completely.
- Paint tip with chosen color using guides or freehand. Keep line clean and consistent.
- Remove guides immediately while polish is wet. Seal with glossy top coat.
Pro Tip: If freehanding, rest your pinky on a stable surface for steady control.
Avoid: Thick polish on tips. This creates bulky edges that chip easily.
Look 5: Sunflower Detail on Short Nails
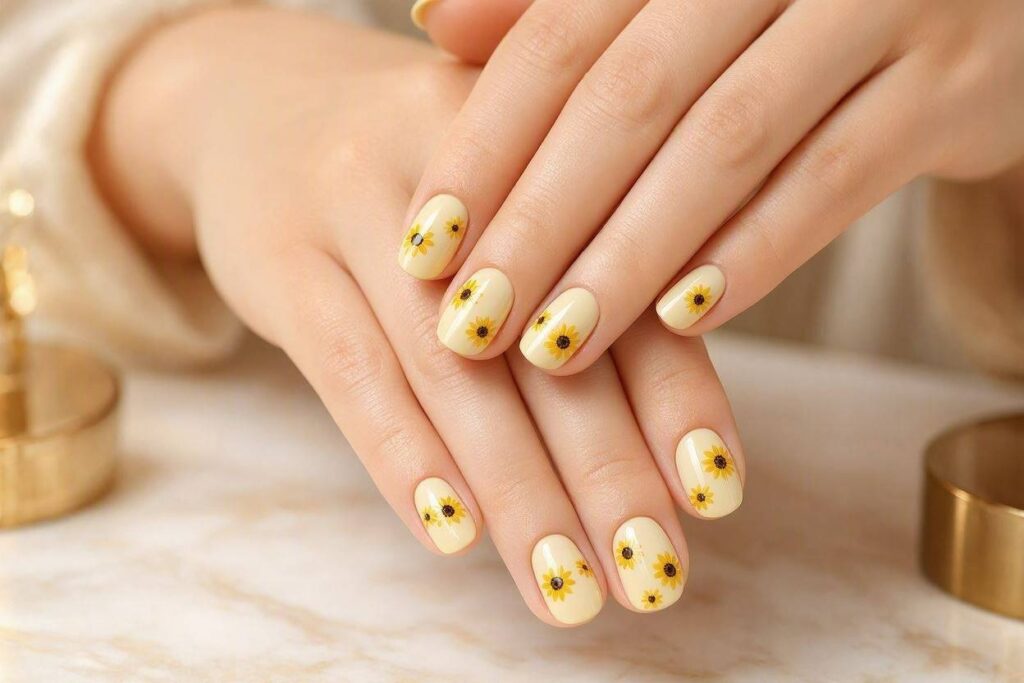
Difficulty: Intermediate | Time: 45 minutes | Best for: Short to medium nails
Small sunflower accents on cream or yellow base add cheerful seasonal touch.
What You Need
- Cream or pale yellow base polish
- Brown/dark orange polish for flower centers
- Yellow polish for petals
- Green polish for leaves (optional)
- Dotting tool + fine nail art brush
- Top coat
- Nail Stamping Kit with Floral Designs (alternative to freehand)
3-Step Application
- Apply two coats of cream/yellow base. Let dry completely.
- On 1-2 accent nails: dot brown center, add small yellow petals around it using fine brush.
- Add tiny green leaves near cuticle if desired. Seal with top coat.
Pro Tip: Keep flowers small on short nails. Large designs overwhelm limited surface area.
️ Avoid: Adding too many details. Minimalism reads cleaner on short nails.
Look 6: Terracotta Solid with Matte Finish
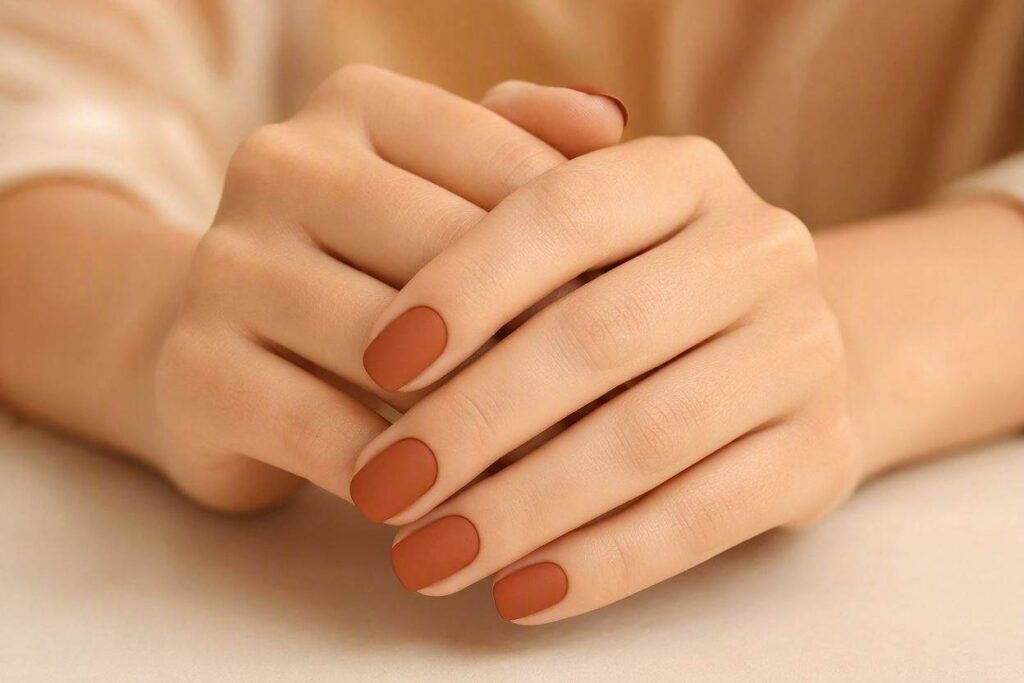
Difficulty: Beginner | Time: 20 minutes | Best for: All nail lengths, professional environments
Solid terracotta shade with matte top coat creates sophisticated, modern look.
What You Need
- Ridge-filling base coat
- Terracotta or warm brownish-orange polish
- Matte top coat (compatible with your polish type)
- Matte Top Coat Options
3-Step Application
- Apply ridge-filling base. Add two thin coats of terracotta. Let each dry completely.
- Apply matte top coat in one smooth, even stroke. Do not go back over areas.
- Let dry 10 minutes before handling.
Pro Tip: Matte finishes show imperfections. Ensure nails are smooth before application.
Avoid: Touching nails while matte top coat dries. This creates shiny fingerprints.
Look 7: Peach Fuzz Glazed Nail
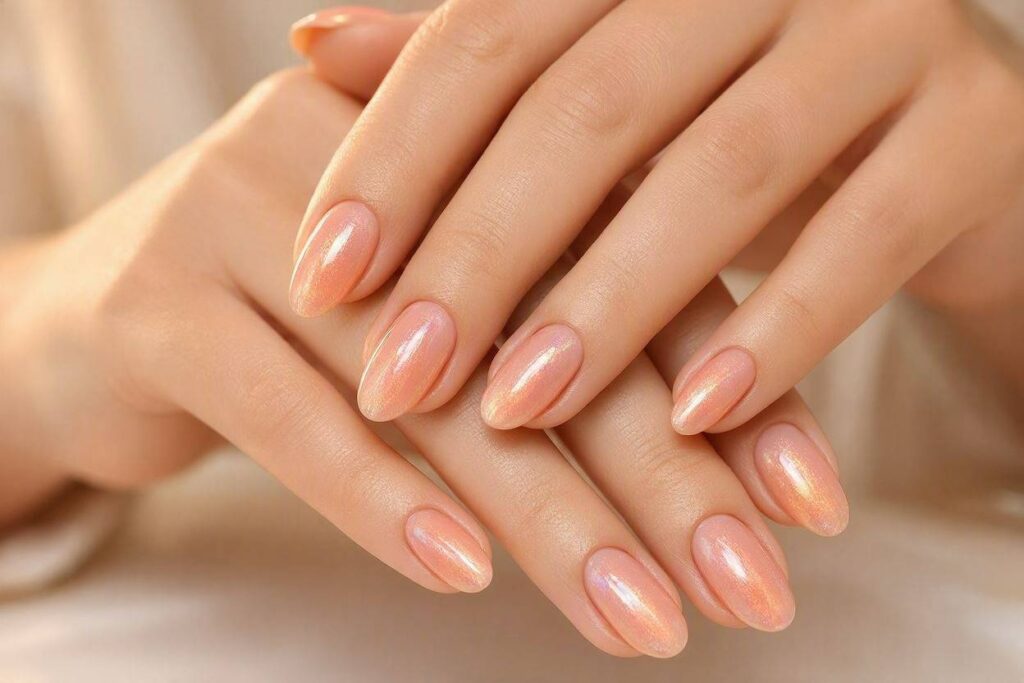
Difficulty: Beginner | Time: 20 minutes | Best for: Subtle, professional wear
Soft peachy-nude finish with glossy sheen. Mimics “glazed” aesthetic while remaining workplace-appropriate.
What You Need
- Clear base coat
- Sheer peach or pale coral polish
- Subtle iridescent or peachy shimmer powder
- Soft applicator
- High-gloss top coat
3-Step Application
- Apply base coat. Add 1-2 coats of sheer peach. Let dry.
- While slightly tacky, dust shimmer powder over nail using soft applicator.
- Seal immediately with high-gloss top coat for glazed effect.
Pro Tip: Reapply top coat every 3-4 days to maintain reflective quality.
Avoid: Using chunky glitter. This creates texture that catches on fabrics.
Look 8: Clean Girl Sheer Pink
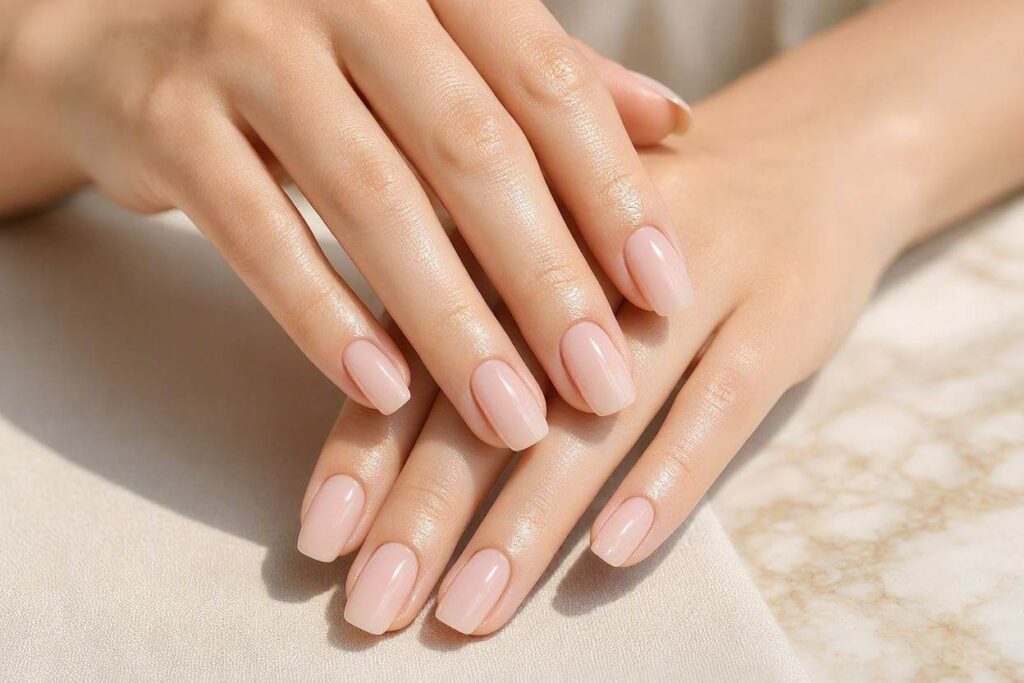
Difficulty: Beginner | Time: 15 minutes | Best for: Back-to-school, professional settings
Barely-there sheer pink with perfectly shaped nails. Polished, minimalist, versatile.
What You Need
- Nail file + buffer
- Cuticle pusher
- Sheer pink or “your lips but better” nude polish
- High-shine top coat
- Cuticle oil
3-Step Application
- File and shape nails uniformly. Push back cuticles gently. Buff surface lightly.
- Apply 1-2 thin coats of sheer pink. Goal is enhancement, not full coverage.
- Finish with high-shine top coat. Apply cuticle oil for groomed appearance.
Pro Tip: Square or squoval shapes read most polished with sheer polishes.
Avoid: Thick coats. Sheer polishes show streaks if applied heavily.
Look 9: Deep Burgundy with Gold Foil Accent
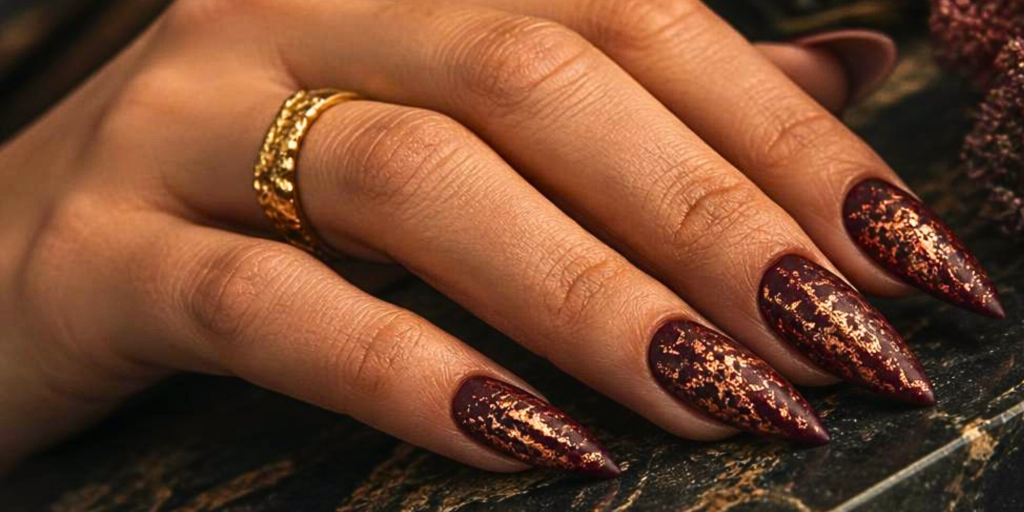
Difficulty: Intermediate | Time: 40 minutes | Best for: Evening wear, early fall transition
Rich burgundy base with strategic gold foil placement. Elegant, sophisticated, seasonally versatile.
What You Need
- Deep burgundy or wine-colored polish
- Gold foil sheets or transfer foil
- Tweezers or small brush for foil placement
- Top coat
- Nail Stamping Kits with Foil
3-Step Application
- Apply two coats of burgundy. Let dry completely.
- Place small gold foil pieces on 1-2 accent nails using tweezers. Press gently to adhere.
- Seal carefully with top coat, ensuring foil is completely covered.
Pro Tip: Apply extra top coat around foil edges to prevent peeling.
Avoid: Placing foil on wet polish. This causes smudging and uneven adhesion.
Look 10: Cottagecore Floral on Cream Base
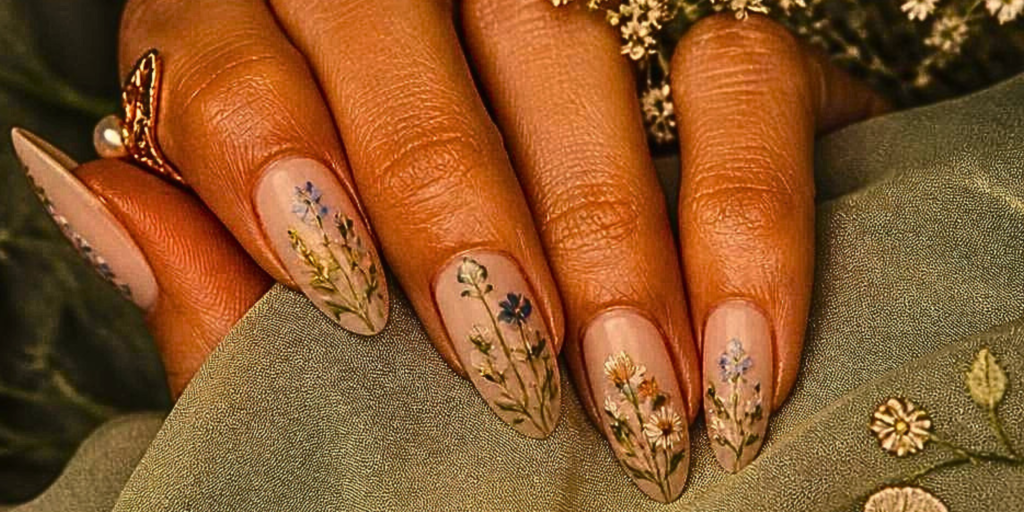
Difficulty: Advanced | Time: 60 minutes | Best for: Special occasions, creative expression
Small hand-painted flowers on cream base. Delicate, romantic, highly customizable.
What You Need
- Cream or off-white base polish
- Soft pink, lavender, or yellow polishes for flowers
- Green polish for stems/leaves
- Fine nail art brush
- Top coat
- Fine-Tip Nail Art Brushes
3-Step Application
- Apply two coats of cream base. Let dry completely.
- Paint small flowers (3-5 petals) on 1-2 accent nails using fine brush.
- Add tiny green stems/leaves. Keep flowers spaced to avoid clutter. Seal with top coat.
Pro Tip: Practice flower shapes on paper first. This builds muscle memory.
Avoid: Overcrowding. Leave negative space for a clean, intentional look.
Nail Prep Checklist: The Foundation of Long-Lasting Manicures
Proper preparation extends wear time across all looks.
Before You Start:
- Remove old polish completely
- Wash hands to eliminate oils
- File nails in one direction only (prevents splitting)
- Gently push back cuticles
- Buff nail surface lightly for smoothness
- Apply dehydrator or rubbing alcohol to remove residual oils
During Application:
- Apply thin coats, not thick layers
- Allow 2-3 minutes drying time between coats
- Cap the free edge (tip) of each nail with polish
- Work in a well-ventilated, dust-free area
After Application:
- Avoid water exposure for 2+ hours
- Apply cuticle oil daily to maintain flexibility
- Wear gloves during cleaning or dishwashing
- Reapply top coat every 3-4 days for glossy finishes
Troubleshooting: Quick Fixes for Common Issues 🔧
| Issue | Quick Fix |
|---|---|
| Polish chips at tips | Cap free edge during application; reapply top coat every 3 days |
| Ombre looks streaky | Work one nail at a time; tap sponge, don’t rub; use wet polish |
| Matte finish shows fingerprints | Avoid touching nails while drying; apply cuticle oil only to skin, not nail |
| Foil lifts or peels | Seal edges with extra top coat; ensure foil is fully covered |
| Sheer polish looks patchy | Apply 2-3 thin coats instead of 1 thick coat; let each dry fully |
| Nail art smudges | Use quick-dry top coat; wait 5 minutes after art before sealing |
A Note on Realistic Nail Art Expectations
Nail art is a skill. Skills improve with practice. Your first attempt may not match salon results. That is normal. That is expected.
Focus on preparation. Focus on thin coats. Focus on drying time. These three factors matter more than expensive products or advanced techniques.
When you prioritize nail health—proper filing, cuticle care, gentle polish removal—your designs last longer and look cleaner. The goal is not perfection on day one. The goal is consistent progress.
That is the intention behind this guide. Clear steps. Realistic timeframes. Practical maintenance. Confidence that comes from knowing your manicure will hold up through daily life.
— THE CHIC STYLE LOOK
Conclusion: Pick One Look. Start Today.
These ten 2026 nail trends cover a range: beginner to advanced, 15 to 60 minutes, subtle to statement. The best choice depends on your time, skill level, and daily activities.
For busy schedules: choose Glazed Donut, Clean Girl Sheer, or Terracotta Matte. For creative expression: choose Abstract Sun, Sunflower Detail, or Cottagecore Floral. For versatile wear: choose Coral Ombre, French Tip Twist, or Burgundy Gold Foil.
Success in nail art comes from preparation, patience, and consistent care. It does not require expensive tools. It does not require professional training. It requires understanding your nail type, selecting appropriate products, and allowing adequate drying time.
Pick one look. Gather your products. Follow the steps. You have the whole season to wear it.
You Will Also Love This
- Your Skin Is Thirsty — The Salt Water Method That Actually Fixes It
- 7 Herbal Teas That Hydrate Your Skin From the Inside
- Tallow Cream: The Ancient Moisturiser That Changed My Skin
- The Complete Inside-Out Hydration Protocol
- New Mother? Your hydration needs are doubled. Read the Postpartum Protocol here.
Disclosure: THE CHIC STYLE LOOK is a participant in the Amazon Associates Program and also shares Shein affiliate links. As an Amazon Associate, we earn from qualifying purchases. We may also earn commissions from Shein links — all at no extra cost to you. Thank you for supporting our work.