

The Science Behind the “Grey Skin” Frustration
Have you ever applied high-coverage foundation over a dark spot or vitiligo patch, only to watch it turn an unflattering, ashy grey? This is the #1 frustration in color correction—and it happens for one simple reason: you’re trying to cover a color instead of neutralizing it.
Professionals call the fix Color Chemistry. But practicing directly on your face is stressful, messy, and wastes expensive products. That’s why the CSL Method starts with the A4 Training Technique: practice on paper first, then transition to skin with confidence.
MUA Tip: Skin oil, temperature, and texture change how pigment behaves. Paper gives you a consistent baseline so you can master pigment ratios before variables mess with your results.
I. What Is the A4 Training Technique?
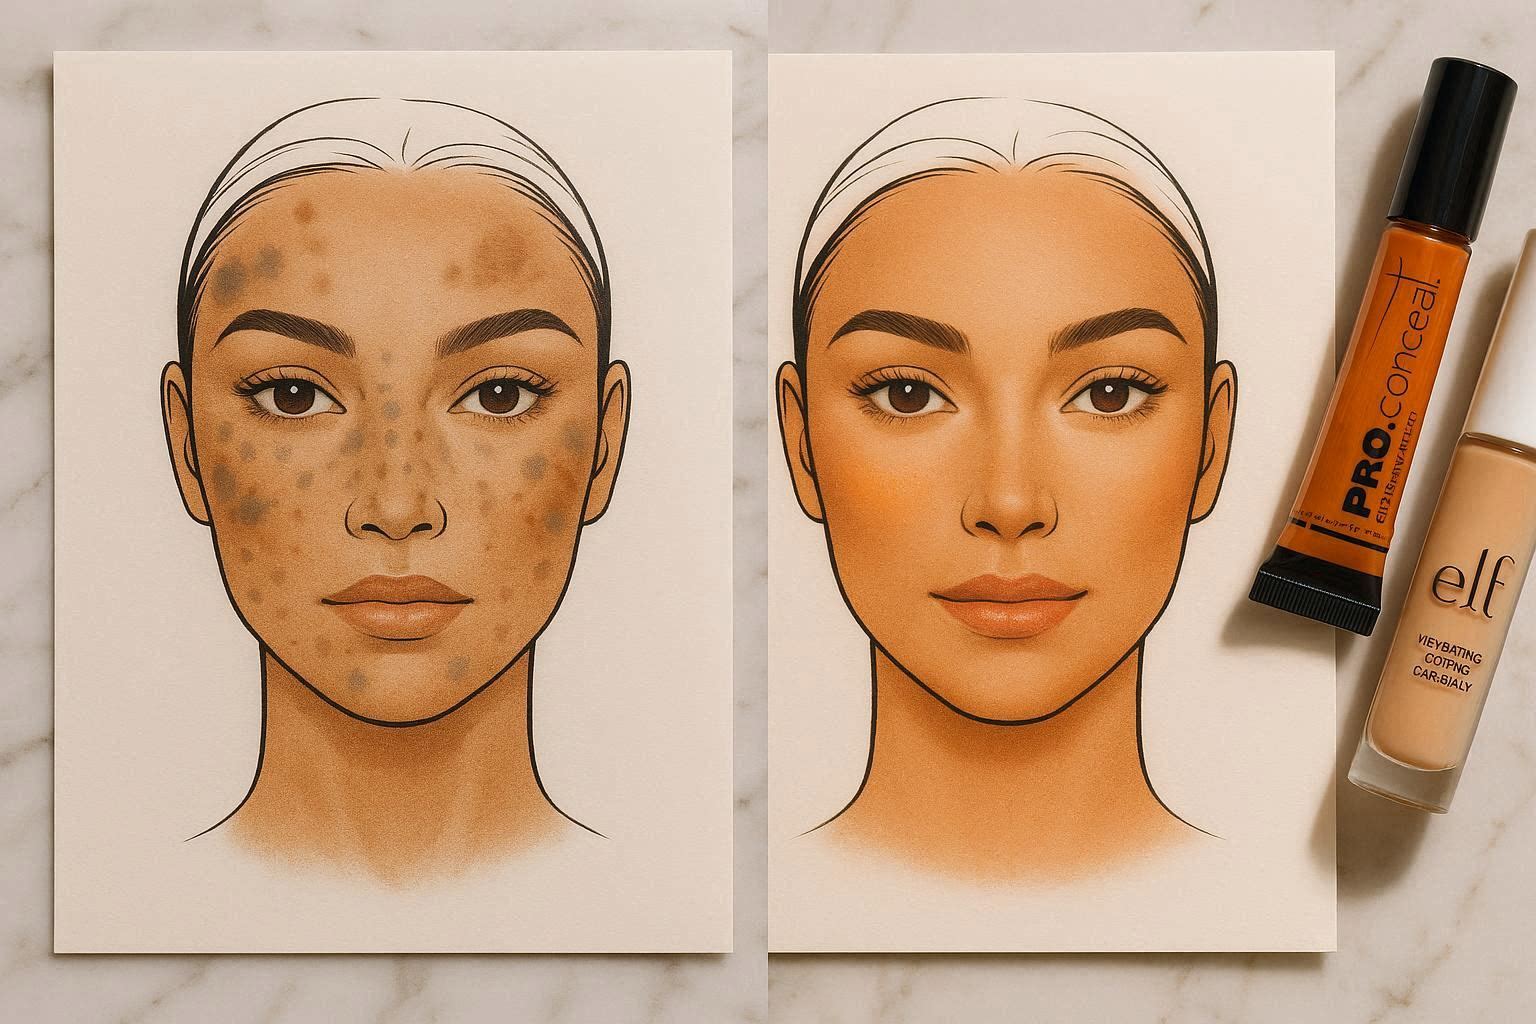
The A4 Training Technique uses professional face templates printed on paper to simulate real skin concerns like vitiligo, melasma, and hyperpigmentation.
Why Practice on Paper First?
.png)
Zero Product Waste: Stop testing pricey concealers on your face while you’re still learning brush pressure.
Instant Visual Proof: Paper shows the exact moment a blue undertone disappears under orange pigment.
Faster Muscle Memory: Stippling (tapping) instead of swiping is easier to master on a flat, consistent surface.
✨ Pro Trick: Use 80–100gsm matte cardstock. Glossy paper repels cream formulas and skews color reading. For realistic practice, lightly mist your template with a hydrating setting spray before applying product—it mimics real skin slip.
II. The Color Wheel: Your Neutralization Blueprint

Color correction follows the Law of Opposites. Every discoloration has a matching corrector that cancels it out.
1. Peach/Orange (The Vitiligo & Dark Circle Savior)
Vitiligo patches and deep dark circles often carry cool, blue, or translucent undertones.
The Problem: Beige foundation over blue = grey cast.
The Fix: Peach or orange adds warm “blood-flow” tones, neutralizing the cool base.
Pro Pick: L.A. Girl HD Pro Conceal in Orange (industry standard for step-one neutralization).
MUA Tip: Never apply corrector straight from the tube. Scrape a tiny amount onto the back of your hand and warm it with your finger. This thins the pigment, prevents creasing, and gives you sheerer, buildable control.
2. Green (The Redness & Acne Shield)
Inflammation, rosacea, and active breakouts sit on the red spectrum.
The Fix: A thin layer of green corrector “extinguishes” redness before foundation.
Pro Pick: NYX Professional Makeup Color Correcting Palette (all-in-one antidotes for fast switching).
Pro Trick: If green corrector looks chalky on paper, mix it with a drop of facial oil or hydrating primer. This trains your hand to blend smoothly and prevents the “mud” effect when you move to real skin.
III. Step-by-Step: The CSL Method Workflow
Apply this sequence on your A4 sheet first. Once mastered, transfer it directly to your skin for a flawless, editorial-ready finish.
Step 1: Map the Undertone

Look closely. Is the area stark white (vitiligo)? Brownish-blue (melasma)? Red/purple (acne scarring)? Identifying the underlying color matters more than matching your surface skin tone.
MUA Tip: View your skin (or our free template) in natural daylight first, then under warm indoor light. Correctors that work in one light may shift in another. Train your eye to see the “true” undertone before touching a brush.
Step 2: Deposit the Corrector
Using a small, dense brush, tap the corrector directly onto the template area.
Golden Rule: Do not blend it out completely. Leave it visible enough to counteract the discoloration underneath.
Pro Trick: Use a flat, synthetic shader brush for the “deposit” phase. Its dense bristles lay pigment flat without dragging the corrector around. Switch to a fluffy pencil brush only for the outer edges.
Step 3: Lock & Cover
Lightly tap a hydrating concealer over the corrector to seal it without dragging.
Pro Pick: e.l.f. Hydrating Camo Concealer sets smoothly without shifting the corrector underneath.
MUA Tip: After layering concealer, press (don’t swipe) a translucent powder with a damp beauty sponge for 3 seconds. This “flash sets” the corrector so it won’t shift or bleed when you apply foundation.
IV. MUA Secrets for Flawless, Long-Lasting Results
Less Is More: Neutralization requires micro-doses of pigment. Too much corrector = orange or green bleed-through foundation.
Cream Over Powder: Cream formulas blend better on paper templates and perform best on textured or dry skin (post-chemo, vitiligo, mature skin).
Lighting Dictates Results: Always practice in natural daylight. Yellow or warm artificial light hides poor neutralization.
Pro Trick: Clean your brush between color zones. Wipe it on a microfiber cloth or paper towel with a drop of brush cleanser. Mixing peach and green on the same brush ruins your neutralization and muddies your foundation.
MUA Tip: Practice 10 minutes daily instead of 1 hour weekly. Muscle memory builds through repetition, not marathon sessions. Your hand will learn pressure control faster than you think.
Conclusion: Turn Insecurity Into Precision
Makeup isn’t about masking—it’s about mastering light and color. The A4 Training Technique removes the fear of “getting it wrong” on your face. You’re not just covering skin; you’re building professional-grade color intuition.
Ready to stop guessing?
Download the Free CSL Method Blueprint & Printable Practice Sheets
You Might Also Enjoy:
What Does Niacinamide Do for Skin? 7 Benefits and How to Use It Correctly
Best Foundation for Mature Skin: 5 Formulas That Don’t Settle Into Fine Lines
How to Fade Hyperpigmentation: The 3 Ingredients That Finally Worked After Years of Trying
What Is Azelaic Acid? The “Quiet” Ingredient Revolutionizing Skincare in 2026
How to Minimize Pores: 3 Ingredients That Make Them Disappear Naturally