
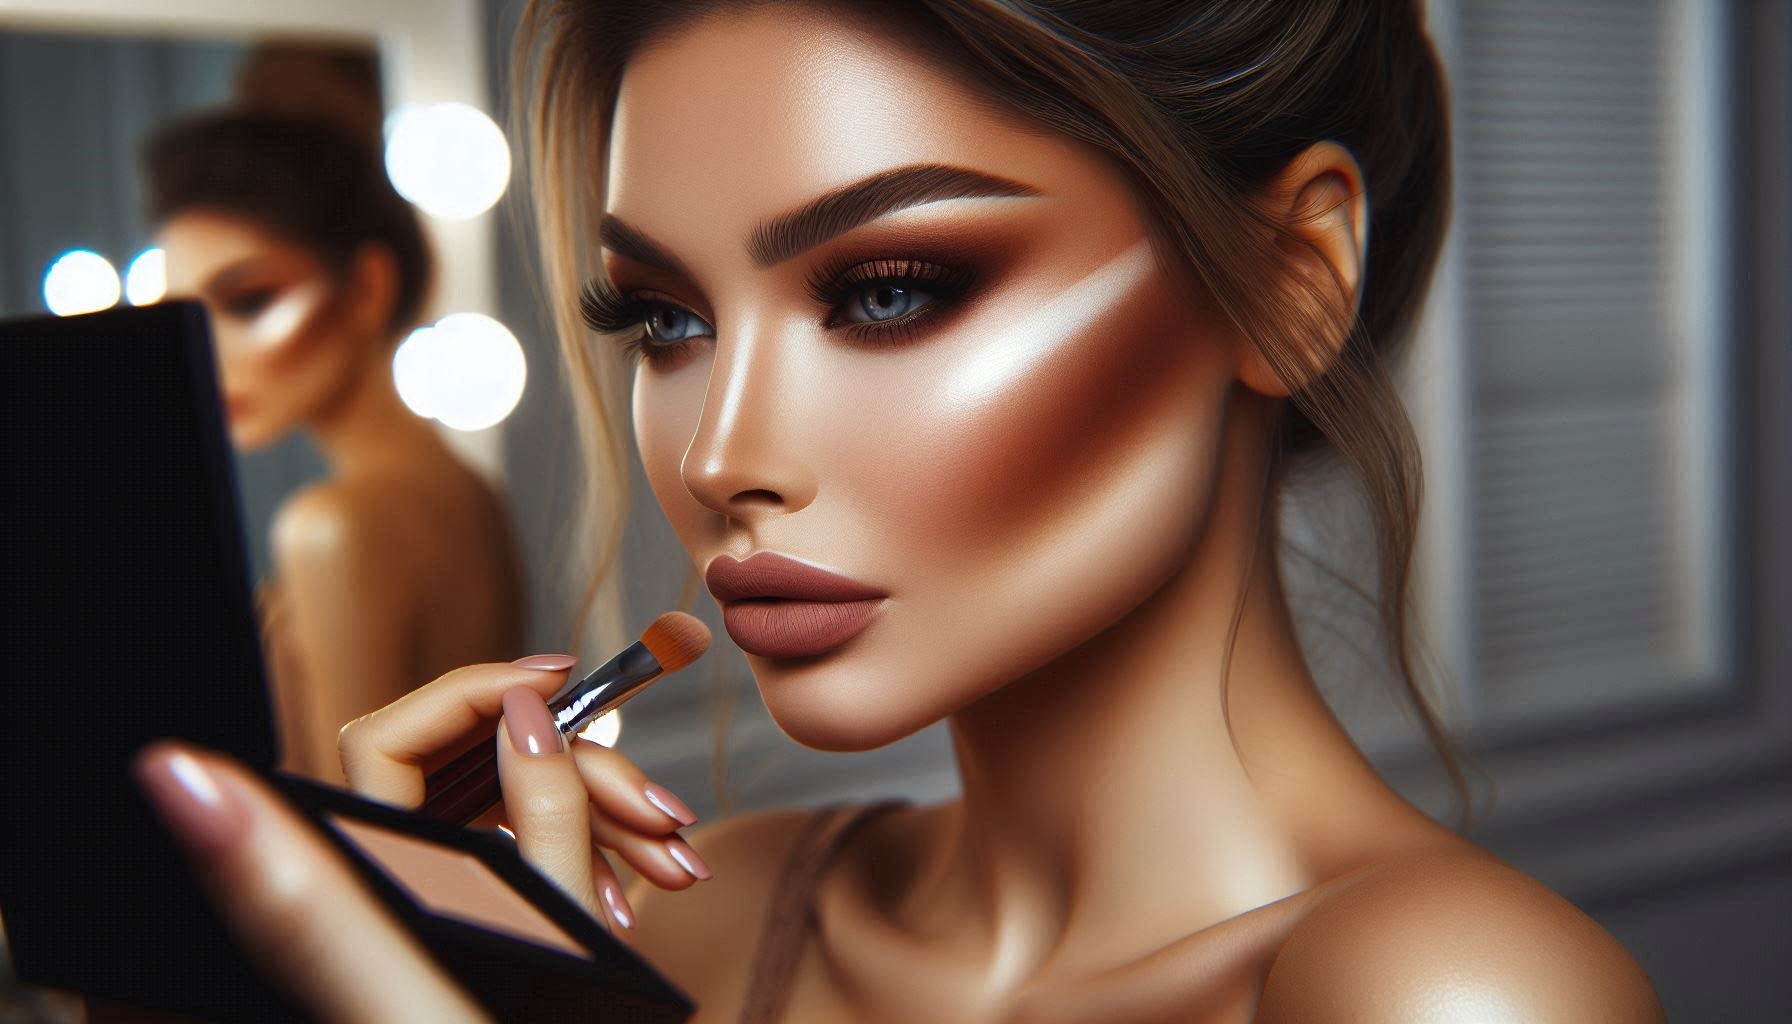
 Creative Contouring Techniques
Forget about chasing makeup trends – your face is a canvas waiting for your unique sculpting masterpiece!
Face contouring isn’t just about copying the latest looks on social media; it’s an empowering art form that allows you to define and highlight your features for a naturally radiant, sculpted look.
by
MART PRODUCTION
This comprehensive guide equips you with the knowledge and insider secrets to become a face architect, shaping your features with confidence.
We’ll delve deep into the world of contouring, exploring drugstore-friendly product options, beginner-approved cream contour techniques, the ever-popular powder contouring method, personalized techniques for every face shape, and advanced hacks to elevate your look.
Beyond the Basics: Playing with Placement
Contouring isn’t just about replicating tutorials; it’s about sculpting your unique canvas. Let’s explore some creative placement techniques.
-
Spotlight Technique : Ever dreamed of doe-eyed allure? Apply a light concealer in a triangular shape beneath your brows, extending outwards. This lifts and brightens the under-eye area, drawing attention to your beautiful eyes. Think of it as a magic wand for tired peepers! Start by applying a small amount of concealer a shade lighter than your skin tone. Use a damp beauty blender to gently tap and blend the product outwards, forming a triangle with the pointed tip reaching towards your temples. This creates the illusion of lifted brows and a more open eye area.
-
Heartbreaker Contour : Craving a touch of romantic softness? The heartbreaker contour is for you! Apply blush in a heart shape on the apples of your cheeks, blending upwards towards your temples. This technique creates a youthful and flushed effect, perfect for a date night or a day out feeling like a sweetheart. Use a cool-toned pink or rose blush for a natural, rosy glow. Start by applying a small amount of blush in the center of your cheeks, then use a fluffy brush to blend the product upwards and outwards in a heart shape. Don’t worry about perfect symmetry – a touch of imperfection adds to the charm!
-
Double Chin Deception : Does a double chin hold you back from feeling confident? Here’s a clever technique to minimize its appearance. Apply a cool-toned cream contour in a thin line just below your jawline, blending downwards. Then, apply a lighter concealer in a narrow line directly above the contour line. Blend both products seamlessly for a sculpted effect. This creates an illusion of definition, making your jawline appear sharper and minimizing the appearance of a double chin. Remember, less is more when it comes to contouring! Start with a small amount of product and gradually build until you achieve the desired effect.
- Spotlight Technique: Light concealer, triangular shape under brows, blend outwards.
- Heartbreaker Contour: Cool-toned pink/rose blush, heart shape on cheeks, blend upwards.
- Double Chin Deception: Cool-toned cream contour below jawline, light concealer above jawline, blend seamlessly.
-
TIPS:
-
Spotlight Technique Reimagined:
Take the spotlight technique to the next level by incorporating colour correctors. Apply a peach or salmon-toned corrector beneath your eyes to neutralize dark circles before layering on your concealer. This extra step brightens the under-eye area and enhances the effectiveness of your concealer. -
Contouring with Bronzer:
Don’t limit contouring to just contour products. Experiment with matte bronzers to sculpt your features and add warmth to your complexion. Choose a bronzer that is a few shades darker than your skin tone and apply it to the hollows of your cheeks, temples, and jawline for a sun-kissed contour. -
Reverse Contouring:
Flip the script on traditional contouring by highlighting the perimeter of your face instead of contouring the hollows. Use a light, matte powder or cream highlighter to define the outer edges of your face, including your forehead, jawline, and cheekbones. This technique creates a subtle sculpting effect without adding depth to the face.
TRICKS:
-
Layering Cream and Powder:
For a long-lasting contour that withstands the elements, try layering cream and powder products. Start by applying a cream contour to the desired areas of your face and then set it with a corresponding powder contour. This combination locks in the cream product while adding definition and dimension. -
Contouring with Tape:
Achieve sharp, precise contours with the help of tape. Place a piece of tape diagonally from the outer corner of your eye towards the tail of your eyebrow. Apply your contour product along the edge of the tape and blend upwards. Once you remove the tape, you’ll be left with a clean, sculpted line. -
Contouring with Stencils:
Stencils aren’t just for arts and crafts – they can also be used for contouring! Invest in contouring stencils or create your own using cardstock. Hold the stencil against your face and apply your contour product over it. When you remove the stencil, you’ll be left with a perfectly contoured shape.
HACKS:
-
DIY Contour Palette:
Customize your own contour palette by repurposing eyeshadows and blushes. Select shades that complement your skin tone and create your own contouring palette by depotting individual pans into a magnetic palette. This allows you to mix and match shades to achieve your desired contour look. -
Contouring with Tools:
Don’t underestimate the power of makeup tools in contouring. Use a small, angled brush to precisely apply contour products to targeted areas such as the nose and jawline. A fan brush can be used to softly diffuse contour powder for a natural finish, while a densely packed brush is ideal for blending cream contour seamlessly. -
Contouring Cheat Sheet:
Create a contouring cheat sheet by taking photos of your completed contour looks from different angles. This visual reference will help you replicate your favourite contouring techniques with ease, ensuring consistent results every time.
EXAMPLES:
-
Colour Corrector Spotlight:
Begin by applying a peach corrector beneath the eyes to neutralize dark circles. Follow up with a light concealer in a triangular shape to brighten and lift the under-eye area. Blend the products seamlessly for a flawless finish. -
Bronzer Contouring:
Use a matte bronzer to contour the hollows of your cheeks, temples, and jawline. Blend the bronzer upwards towards the hairline for a natural-looking sculpted effect that adds warmth to the complexion. -
Reverse Contouring Technique:
Apply a matte highlighter along the outer edges of the face, including the forehead, jawline, and cheekbones. This technique creates subtle definition and dimension without adding depth to the face.
PROBLEM SOLVING:
-
Patchy Application Fix:
If your contour appears patchy, try applying a thin layer of translucent powder before contouring. This helps to absorb excess oils and creates a smooth base for the contour product to adhere to. -
Blending Blunders:
If you’ve blended your contour too harshly, use a clean makeup sponge or brush to buff out the edges. Alternatively, apply a light dusting of translucent powder over the contoured areas to soften any harsh lines. -
Overdone Contour Correction:
If you’ve applied too much contour, don’t panic. Use a clean brush or sponge to blend out the excess product, focusing on diffusing the colour for a more natural finish. You can also use a damp sponge to pat over the contoured areas to tone down the intensity.
-
Unorthodox Tools and Application Tricks
Sure, you have brushes, but who needs them when you have creativity? Here are some unconventional tools and application tricks to level up your contouring game:
-
The Beauty Blender Bounce: Ditch the brushes! A damp beauty blender allows for seamless blending and a diffused finish. Bounce the blender gently over cream contour products, starting from the apples of your cheeks and blending outwards towards your temples and hairline. This tapping motion helps to melt the product into your skin for a natural-looking finish.
-
The Spoon Trick: Feeling creative? Use a chilled metal spoon for a sharper contour line. Place the rounded edge of the spoon against your cheekbone and apply your cream contour product directly above it. The cool metal helps the product stay in place for a more defined look. Blend the product upwards and outwards using a small brush or your fingertips for a seamless finish.
-
The Cotton Swab Shuffle: For intricate details and precise lines, cotton swabs are your new best friend. Dip a cotton swab in cream contour or highlighter to create delicate lines. Sharpen the tip with a tissue for ultra-fine lines, like defining the Cupid’s bow or highlighting the inner corners of your eyes. Use a light touch and build up the color gradually for precise control.
- Beauty Blender Bounce: Damp beauty blender, bounce over cream contour, start from apples of cheeks, blend outwards.
- Spoon Trick: Chilled metal spoon, place on cheekbone, apply cream contour above, blend upwards and outwards.
- Cotton Swab Shuffle: Cotton swab dipped in cream contour/highlighter, create delicate lines, sharpen tip for ultra-fine lines, light touch and build up color.
TIPS:
-
Spatula Sculpting:
Utilize a small spatula or flat-edged makeup tool to carve out precise contour lines. Dip the edge of the spatula into your contour product and gently press it along the desired contour areas, such as the hollows of the cheeks and jawline. Then, blend the product using a makeup sponge or brush for seamless integration. -
Hairline Contouring:
Extend your contouring beyond the face and onto the hairline for a more cohesive look. Apply a contour product along the edges of your hairline to create the illusion of a more sculpted forehead. Blend the product well to avoid any harsh lines and ensure a natural finish. -
Layered Contouring:
Experiment with layered contouring to add depth and dimension to your contour look. Start by applying a lighter contour shade to define the general contours of your face. Then, layer a darker contour shade over the lighter one to intensify the sculpting effect. Blend the layers seamlessly for a flawless finish.
TRICKS:
-
Stencil Stamping:
Create custom contouring stencils using adhesive paper or flexible plastic sheets. Cut out desired contour shapes, such as cheekbone templates or jawline guides, and adhere them to your face. Then, use a contouring brush or sponge to apply contour product within the stencil boundaries. Once finished, remove the stencils to reveal perfectly sculpted contours. -
Finger Blending:
Harness the warmth and precision of your fingertips for seamless contour blending. After applying contour product to the desired areas, use your fingers to gently blend and diffuse the product into your skin. The natural oils in your fingertips help melt the product seamlessly, resulting in a soft, airbrushed finish. -
Airbrush Contouring:
Achieve professional-quality contouring results at home with an airbrush makeup system. Load your airbrush gun with contouring makeup and adjust the pressure settings to control the intensity of the application. Spray a fine mist of contour product along the contours of your face, blending as you go for a flawless, camera-ready finish.
HACKS:
-
Tape-Free Precision:
Achieve crisp, precise contour lines without the need for tape by using a flat-edged makeup spatula or credit card as a guide. Hold the edge of the spatula or card against the desired contour line and apply contour product along the edge. Then, carefully remove the guide to reveal clean, defined contours. -
Contour Mapping:
Create a contour map of your face using a contouring pencil or cream product. Start by outlining the contours of your face, including the hollows of your cheeks, jawline, and temples. Then, use a blending brush or sponge to blend the outlined areas, gradually building up the intensity for a sculpted finish. -
DIY Contouring Stamps:
Customize your own contouring stamps using small, intricate rubber stamps or carved erasers. Dip the stamp into contour product and gently press it onto your skin, focusing on areas that require contouring, such as the cheekbones or jawline. Lift the stamp to reveal perfectly contoured lines, then blend as needed for a seamless finish.
EXAMPLES:
-
Spatula Sculpting Technique:
Begin by dipping the edge of a small spatula into your preferred contour product. Press the spatula along the hollows of your cheeks and jawline, creating defined contour lines. Then, blend the product using a makeup sponge or brush until the contours seamlessly meld with your skin. -
Hairline Contouring Method:
Apply a contour product along the edges of your hairline using a contour brush or sponge. Blend the product into your hairline and forehead to create a more sculpted appearance. This technique adds dimension to your face and enhances the overall contouring effect. -
Layered Contouring Process:
Start by applying a lighter contour shade to the general contours of your face, such as the hollows of your cheeks and temples. Then, layer a darker contour shade over the lighter one to intensify the sculpting effect. Blend the layers seamlessly for a flawless, multi-dimensional contour.
PROBLEM SOLVING:
-
Spatula Clean-up:
If excess contour product accumulates on the spatula during application, wipe it clean with a makeup wipe or tissue before continuing. This prevents unintended smudging or transfer of product and ensures precise application. -
Blending Fingertip Residue:
If residual contour product remains on your fingertips after blending, gently wipe them clean with a makeup wipe or damp cloth. This prevents unintentional transfer of product to other areas of your face and ensures a seamless, uniform contour finish. -
Stencil Sticking:
If contouring stencils fail to adhere properly to your skin, lightly mist them with setting spray before application. This helps create a temporary adhesive bond between the stencil and your skin, ensuring precise contouring without slippage or movement.
Colour Outside the Lines: Exploring Unconventional Shades
Ditch the brown bronzer! Let’s explore unconventional shades that add a unique touch to your contour:
-
Rosy Glow: Ditch the traditional brown bronzer and explore the world of blush contouring! Apply a cool-toned pink or rose blush along your cheekbones and blend upwards towards your temples. This creates a natural, rosy glow with a subtle sculpting effect. Look for blushes with a hint of shimmer for a touch of radiance.
-
Sun-Kissed Lavender: Feeling adventurous? Try a lavender cream blush for a unique and ethereal contour. Apply it along your cheekbones and blend upwards towards your temples. Pair this with a light lavender highlighter on your cheekbones and brow bone for a cohesive, lavender-kissed look. This cool-toned combination is perfect for fair skin tones and adds a touch of whimsy to your makeup.
-
Bronzer for Dimension: Bronzer isn’t just for adding warmth. Apply a cool-toned bronzer in the hollows of your cheeks and along the sides of your nose for added definition. This creates a subtle sculpting effect without harsh lines. Opt for a matte bronzer for a more natural look, or a bronzer with a hint of shimmer for a touch of warmth.
-
Rosy Glow: Cool-toned pink/rose blush, apply along cheekbones, blend upwards, shimmery blush for radiance.
-
Sun-Kissed Lavender: Lavender cream blush, apply along cheekbones, blend upwards, pair with lavender highlighter for cohesive look, cool-toned for fair skin.
-
Bronzer for Dimension: Cool-toned bronzer, apply in hollows of cheeks and sides of nose, matte bronzer for natural look, shimmery bronzer for warmth.
TIPS:
-
Muted Mauve Contour:
Step outside the conventional contour colour palette and explore the soft, muted tones of mauve. Apply a mauve-toned contour product along the hollows of your cheeks and jawline for a subtle yet striking sculpting effect. This unexpected hue adds depth and dimension to your face while maintaining a natural appearance. -
Taupe Terracotta Sculpting:
Embrace the warm, earthy tones of terracotta for a sculpted contour with a twist. Opt for a taupe or terracotta-coloured contour product and apply it strategically to the contours of your face, blending well for a seamless finish. This unconventional shade adds warmth and definition to your complexion, imparting a sun-kissed glow year-round. -
Vivid Violet Definition:
Make a statement with vivid violet contouring to add a pop of colour and dimension to your face. Choose a bold violet contour product and apply it sparingly to the hollows of your cheeks and temples, blending gently for a soft, diffused effect. This unexpected hue creates a striking contrast against your skin tone, resulting in a truly unique contour look.
TRICKS:
-
Gradient Blending Technique:
Create a seamless transition between contour colours by employing a gradient blending technique. Start with the lightest contour shade and apply it to the highest points of your face, such as the temples and cheekbones. Then, gradually layer darker contour shades along the hollows of your cheeks and jawline, blending each shade seamlessly for a gradient effect. -
Colour Correction Concealing:
Neutralize any unwanted undertones or discolorations with colour correction concealers before applying unconventional contour shades. Use a green colour corrector to counteract redness or a peach corrector to brighten dull areas. This ensures a flawless base for applying vibrant contour colours, allowing them to stand out without interference from underlying skin tones. -
Sheer Layering Method:
Achieve buildable intensity with unconventional contour shades by employing a sheer layering method. Start with a small amount of product and gradually build up the colour intensity to your desired level. This allows for greater control over the final contour look, ensuring a subtle or dramatic effect depending on your preference.
HACKS:
-
DIY Contour Customization:
Customize your contour shades to suit your unique preferences and skin tone by mixing different colours together. Experiment with mixing mauve, terracotta, and violet contour products to create custom shades that complement your complexion perfectly. This DIY approach allows for endless creativity and ensures a contour look that’s tailored to you. -
Multitasking Makeup Magic:
Maximize the versatility of unconventional contour shades by using them for multiple makeup purposes. In addition to contouring, repurpose mauve, terracotta, and violet products as eyeshadows or blushes for a cohesive, monochromatic makeup look. This multitasking approach streamlines your makeup routine and makes the most of your contouring products. -
Stippling Brush Precision:
Achieve precise application of unconventional contour shades with a stippling brush. Dip the brush into your chosen contour colour and stipple it along the contours of your face for targeted placement. The stippling action ensures even distribution of colour while allowing you to control the intensity of the contour effect.
EXAMPLES:
-
Muted Mauve Contour Look:
Apply a muted mauve contour product along the hollows of your cheeks and jawline, blending well for a subtle sculpting effect. Pair the mauve contour with soft, neutral-toned makeup for a balanced and sophisticated look that enhances your natural features. -
Taupe Terracotta Sculpted Glow:
Opt for a taupe or terracotta-coloured contour product and apply it strategically to the contours of your face, focusing on the temples, cheekbones, and jawline. Blend the product well for a seamless finish that adds warmth and definition to your complexion. Complete the look with bronzed eyeshadow and a nude lip for a sun-kissed glow. -
Vivid Violet Statement Contour:
Make a bold statement with vivid violet contouring by applying a bold violet contour product along the hollows of your cheeks and temples. Blend the colour gently for a soft, diffused effect that creates a striking contrast against your skin tone. Pair the vibrant contour with minimal makeup for a modern and edgy look that commands attention.
PROBLEM SOLVING:
-
Patchy Pigmentation Fix:
If unconventional contour shades appear patchy or uneven on the skin, try layering a neutral-toned powder contour product over the top to blend and diffuse the colour. The neutral powder helps anchor the vibrant contour shade, resulting in a more seamless and uniform application. -
Colour Clash Correction:
If contour colours clash with your overall makeup look, balance the vibrancy of unconventional shades by incorporating complementary hues into your eye or lip makeup. For example, pair violet contouring with neutral eyeshadows and a soft pink lip colour to create a cohesive and harmonious makeup look. -
Blending Blunders Recovery:
If blending errors occur during application, use a clean makeup sponge or brush to gently buff and blend the contour colours into the skin. Focus on areas where harsh lines or uneven patches are present, working in small circular motions to soften and diffuse the colour. Finish by setting the contour with a translucent powder for a flawless and long-lasting finish.
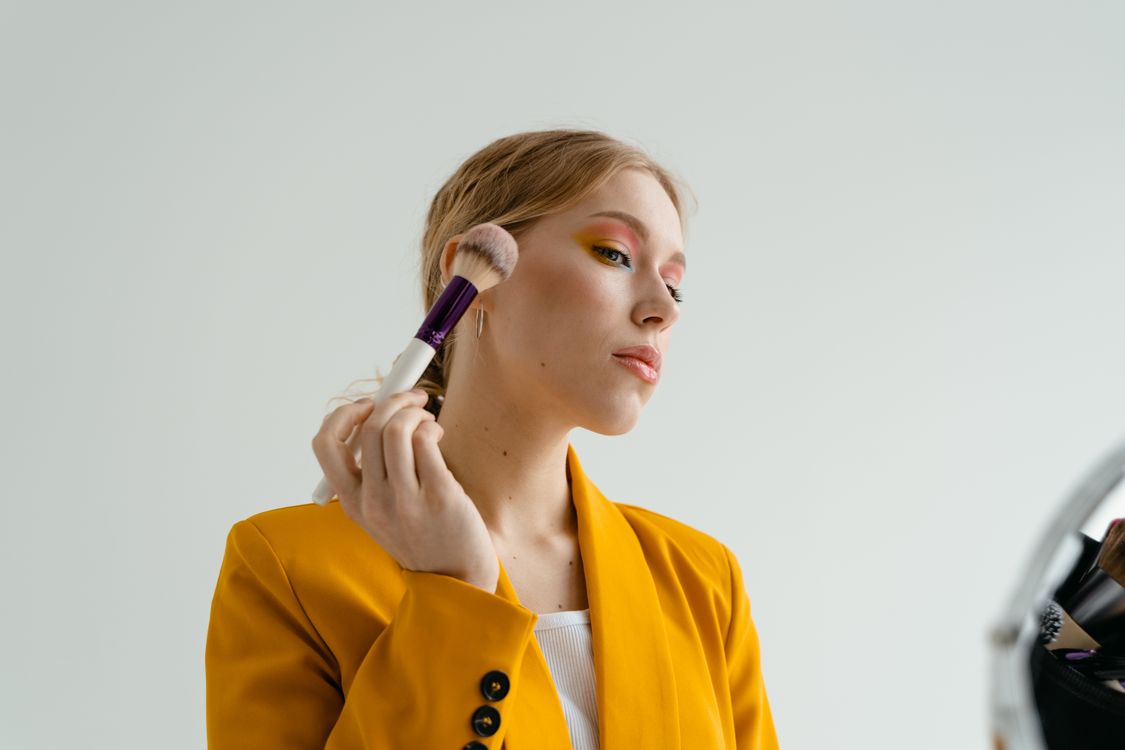
Cream vs. Powder: Choosing the Right Contour Product

by
Alena Darmel
Not all contour products are created equal. Learn how to choose the right formula for your skin type and desired effect:
-
Cream Contour: Perfect for dry or normal skin types, cream contour products blend seamlessly and create a natural, dewy finish. They are ideal for beginners as they allow for easier blending. However, cream products can crease on oily skin, so be sure to set them with a powder if needed.
-
Powder Contour: A great option for oily or combination skin types, powder contour products provide a more buildable and long-lasting finish. They are ideal for creating sharper contours and defined features. However, powder products can be trickier to blend, so practice is key.
- Cream Contour: Dry/normal skin, dewy finish, easy to blend, set with powder for oily skin.
- Powder Contour: Oily/combination skin, buildable, long-lasting, sharp contours, trickier to blend.
TIPS:
-
Cream Contour Benefits:
Cream contour products are ideal for individuals with dry or normal skin types due to their hydrating and blendable formulas. They provide a dewy finish that adds luminosity to the skin, perfect for achieving a natural-looking contour. When applying cream contour, use a damp makeup sponge or brush to blend the product seamlessly into the skin for a flawless result. -
Powder Contour Advantages:
Powder contour products are well-suited for those with oily or combination skin types as they offer a matte finish that helps control excess oil and shine. They provide buildable coverage and long-lasting wear, making them ideal for achieving sculpted and defined features. When using powder contour, apply the product with a fluffy brush and blend gently to avoid harsh lines. -
Hybrid Formulas for Versatility:
Consider hybrid contour formulas that combine the benefits of both cream and powder products for maximum versatility. These hybrid formulas offer the blendability of cream contour with the long-lasting wear of powder contour, allowing you to customize your contouring routine based on your skin’s needs and the desired makeup look.
TRICKS:
-
Layering Technique:
Enhance the longevity and intensity of your contour by layering cream and powder products together. Start by applying a thin layer of cream contour to the desired areas, then set it with a matching powder contour shade. This layering technique locks the contour in place while adding depth and dimension to your features. -
Spot Concealing with Cream Contour:
Use cream contour products as spot concealers to address imperfections and uneven skin tone. Choose a cream contour shade that matches your skin tone and apply it directly to areas of concern, such as blemishes or redness. Blend the product gently for seamless coverage that camouflages imperfections while providing a sculpted finish. -
Mixing Mediums for Customization:
Customize the texture and coverage of your contour products by mixing cream and powder formulas together. Combine a small amount of cream contour with loose setting powder to create a lightweight cream-to-powder formula that offers buildable coverage and a natural matte finish. This mixing technique allows for greater control over the contouring process, ensuring a personalized result.
HACKS:
-
Cream-to-Powder Transformation:
Transform cream contour products into a powder finish by setting them with translucent setting powder. After applying cream contour to the desired areas, use a fluffy brush to dust translucent powder over the top. This sets the cream contour in place, mattifying the finish and extending the wear time for a seamless and long-lasting result. -
Powder-to-Cream Blending Technique:
Convert powder contour products into a creamy consistency by mixing them with a small amount of moisturizer or facial oil. This blending technique creates a creamy contour formula that glides effortlessly onto the skin, allowing for easy blending and a natural finish. Apply the mixture to the contours of your face and blend well for a sculpted look with a luminous sheen. -
Dual-Ended Applicator Innovation:
Invest in dual-ended contour applicators that feature both cream and powder formulas in one convenient package. These innovative tools allow for effortless contouring on the go, offering the flexibility to switch between cream and powder textures based on your preferences and skin’s needs. With a dual-ended applicator, achieving flawless contouring has never been easier.
EXAMPLES:
-
Cream Contour Routine:
Begin your makeup routine by applying a hydrating primer to prep the skin, followed by a cream contour product applied to the hollows of your cheeks, temples, and jawline. Blend the cream contour using a damp makeup sponge for seamless coverage, then set it with translucent powder to extend the wear time and mattify the finish. -
Powder Contour Look:
Start with a mattifying primer to control excess oil and create a smooth base, then apply a powder contour product to the desired areas using a fluffy brush. Blend the powder contour gently for a natural finish, focusing on building depth and dimension without over-applying. Complete the look with a setting spray to lock the contour in place for all-day wear. -
Hybrid Formula Experimentation:
Experiment with hybrid contour formulas by mixing cream and powder products together to create a customized contour routine. Begin with a cream contour applied to the contours of your face, then set it with a matching powder contour shade for added intensity and longevity. This hybrid approach combines the best of both worlds, offering the blendability of cream with the staying power of powder.
PROBLEM SOLVING:
-
Creasing Concerns:
If cream contour products crease or settle into fine lines throughout the day, set them with a translucent setting powder to minimize creasing and prolong wear time. Use a fluffy brush to dust a small amount of powder over the top of the cream contour, focusing on areas prone to creasing such as the under-eye area and smile lines. -
Patchy Powder Application:
If powder contour products appear patchy or uneven on the skin, mist a setting spray over the top to melt the powder into the skin for a more seamless finish. The setting spray helps bind the powder particles together, resulting in a smooth and cohesive contour application that lasts throughout the day. -
Blending Blunders Resolution:
If blending errors occur during application, use a clean makeup sponge or brush to buff and blend the contour products into the skin. Start with light tapping motions to diffuse harsh lines, then blend in circular motions to seamlessly merge the contour with your foundation. Finish by dusting translucent powder over the top to set the contour and create a flawless finish that lasts.
Highlighting for Dimension: Strategic Highlighter Placement
Contouring isn’t just about shadows; highlighters play a crucial role in defining and sculpting your features. Here’s how to strategically place highlighter for maximum impact:
-
Cheekbones: Apply highlighter to the tops of your cheekbones, blending upwards towards your temples. This creates a lifted and sculpted appearance.
-
Brow Bone: Apply a light touch of highlighter to your brow bone to accentuate your brows and create an illusion of wider eyes.
-
Cupid’s Bow: Highlight the centre of your Cupid’s bow to make your lips appear fuller and plumper.
-
Inner Corners: Apply highlighter to the inner corners of your eyes to brighten up your entire eye area and create a more awake look.
- Highlighter Placement:
- Cheekbones: Tops, blend upwards towards temples.
- Brow Bone: Light touch, accentuate brows, wider eyes.
- Cupid’s Bow: Centre, fuller lips.
- Inner Corners: Brighten eye area, awake look.
TIPS:
-
Strategic Placement Technique:
Strategically apply highlighter to specific areas of the face to enhance your contour and create a luminous, radiant complexion. Focus on areas that naturally catch light, such as the tops of the cheekbones, brow bone, Cupid’s bow, and inner corners of the eyes, to accentuate your features and add dimension to your face. -
Light-Reflecting Formulas:
Opt for highlighter formulas with light-reflecting properties, such as finely milled shimmer or pearlescent pigments, to achieve a subtle yet impactful glow. These formulas effortlessly blend into the skin, imparting a luminous sheen without emphasizing texture or fine lines, for a flawless and radiant finish. -
Layering Technique:
Layer highlighter over cream or powder contour products to enhance their effects and create a seamless, sculpted look. Start by applying your contour products as usual, then gently sweep highlighter over the high points of your face using a fan brush or fluffy blending brush. This layering technique adds dimension to your contour while imparting a lit-from-within glow.
TRICKS:
-
Mixing Mediums for Customization:
Customize the intensity and finish of your highlighter by mixing it with other products, such as moisturizer or foundation. For a subtle, dewy glow, blend a small amount of liquid highlighter into your moisturizer or foundation before applying it to your skin. This mixing technique creates a luminous base that radiates from within, perfect for achieving a natural-looking glow. -
Precision Highlighting with Angled Brush:
Use an angled highlighting brush to precisely apply highlighter to targeted areas of the face, such as the tops of the cheekbones and brow bone. The angled shape of the brush allows for controlled application and seamless blending, ensuring a flawless and sculpted finish that enhances your contour. -
Strobing Technique for Intense Glow:
Try the strobing technique to achieve an intense, editorial-worthy glow. Apply a generous amount of highlighter to the high points of your face, including the tops of your cheekbones, brow bone, Cupid’s bow, and bridge of your nose, using a dense highlighting brush or your fingertips. This technique creates a radiant, lit-from-within complexion that commands attention.
HACKS:
-
Spotlight Effect with Damp Brush:
Create a spotlight effect on the high points of your face by dampening your highlighting brush with setting spray before applying highlighter. The damp brush intensifies the pigmentation and luminosity of the highlighter, resulting in a striking and radiant glow that lasts throughout the day. -
Layering for Multi-Dimensional Glow:
Layer different shades and textures of highlighter to achieve a multi-dimensional glow that mimics natural light reflection. Start with a creamy or liquid highlighter as a base, then layer a powder highlighter in a complementary shade over the top using a fluffy brush. This layering technique adds depth and dimension to your highlight, creating a customized glow that flatters your skin tone. -
Reverse Contouring with Highlighter:
Experiment with reverse contouring by applying highlighter to the areas of your face where light naturally hits, such as the centre of your forehead, bridge of your nose, and chin. This technique creates a soft, diffused glow that brightens the complexion and enhances your features without the need for heavy contouring.
EXAMPLES:
-
Everyday Radiance Look:
Achieve a natural-looking glow for everyday wear by applying a champagne-toned highlighter to the tops of your cheekbones, brow bone, and Cupid’s bow using a fluffy blending brush. This subtle highlight enhances your features and adds a healthy radiance to your complexion, perfect for a fresh and luminous makeup look. -
Dramatic Evening Glow:
Elevate your evening makeup look with a bold and luminous glow by layering a golden-toned highlighter over a cream or powder contour base. Apply the highlighter to the high points of your face using a damp brush for intensified pigmentation, focusing on areas that catch the light for a dazzling and radiant finish that commands attention. -
Soft Focus Bridal Glow:
Create a soft and ethereal glow for your bridal makeup look by blending a pearl-toned highlighter onto the high points of your face with a precision highlighting brush. Concentrate the highlighter on the tops of your cheekbones, brow bone, and inner corners of your eyes to achieve a luminous, lit-from-within complexion that enhances your natural beauty and radiates elegance.
PROBLEM SOLVING:
-
Patchy Highlighter Application:
If highlighter appears patchy or uneven on the skin, use a clean makeup sponge or brush to blend and diffuse the product for a seamless finish. Start with light tapping motions to soften harsh lines, then blend in circular motions to evenly distribute the highlighter across the skin. Finish by lightly dusting translucent powder over the top to set the highlight and create a flawless, long-lasting glow. -
Overly Intense Highlight:
If highlighter appears too intense or metallic on the skin, tone it down by gently buffing a clean makeup sponge or brush over the highlighted areas to soften the finish. Use a pressing motion to blend the product into the skin, diffusing the pigmentation for a more subtle and natural-looking glow. Finish by dusting a sheer layer of translucent powder over the top to mattify the highlight and create a soft-focus effect. -
Uneven Texture Accentuation:
If highlighter accentuates uneven texture or fine lines on the skin, opt for a finely milled formula with light-reflecting properties to minimize emphasis on imperfections. Look for highlighters with micro-shimmer or pearlescent pigments that blend seamlessly into the skin, creating a smooth and luminous finish that blurs the appearance of texture. Apply the highlighter with a light hand and build up the intensity gradually to achieve a flawless and radiant complexion.
Baking for Flawless Finish: Setting Your Contour
Don’t let your hard work fade! Learn the art of baking to ensure your contour lasts all day (or night) long:
-
Apply translucent powder: After applying your cream contour and concealer, use a translucent setting powder to lock everything in place. Focus on areas where you applied cream products, such as your under-eye area, cheekbones, and jawline.
-
Let it bake: Leave the setting powder on your face for 5-10 minutes. This allows the powder to absorb any excess oils and further set your makeup.
-
Dust off the excess: After baking, use a fluffy brush to gently dust off any excess powder. This will ensure a flawless and natural-looking finish.
- Baking for Flawless Finish:
- Apply translucent powder to areas with cream products.
- Let powder sit for 5-10 minutes.
- Dust off excess powder with fluffy brush.

by
cottonbro studio
TIPS:
-
Translucent Powder Application:
After applying your cream contour and concealer, use a fluffy makeup brush or sponge to evenly distribute translucent setting powder over the contoured areas of your face. Focus on areas where you applied cream products, such as the under-eye area, cheekbones, and jawline, to lock everything in place and prevent creasing throughout the day. -
Leave to Set:
Allow the setting powder to sit on your face for 5-10 minutes to “bake” or absorb any excess oils and further set your makeup. During this time, you can work on other areas of your makeup routine or simply relax and let the powder work its magic for a flawless finish. -
Dust off Excess Powder:
After baking, use a clean fluffy brush to gently dust off any excess powder from your face. This step helps to ensure a seamless and natural-looking finish while removing any excess product that may have settled into fine lines or creases.
TRICKS:
-
Pressing Motion for Longevity:
To ensure your contour stays in place all day long, use a pressing motion when applying translucent powder over cream products. Instead of sweeping or buffing the powder onto the skin, gently press it into the contours of your face using a makeup sponge or powder puff. This technique helps to “lock in” your contour and concealer for extended wear without budging or fading. -
Layering Technique for Intensity:
For added intensity and longevity, layer translucent powder over your cream contour in multiple thin layers. After applying the first layer of powder, use a damp makeup sponge to press the powder into the skin, then repeat the process with additional layers as needed. This layering technique helps to build up coverage and set your contour for a flawless finish that lasts all day. -
Spot-Touching for Precision:
If certain areas of your contour require extra setting, use a small precision brush or makeup sponge to spot-touch translucent powder onto those areas. This targeted application ensures that your contour stays in place without disturbing the rest of your makeup, allowing you to maintain a seamless and sculpted look throughout the day.
HACKS:
-
Baking with Translucent Powder:
To achieve a more intense and long-lasting contour, try “baking” with translucent powder. After applying your cream contour and concealer, use a damp makeup sponge to apply a generous amount of translucent powder to the contoured areas of your face. Allow the powder to sit for 5-10 minutes, then dust off the excess for a flawless finish that stays put all day. -
Setting Spray Finishing Touch:
For extra insurance against fading or smudging, finish your makeup look with a spritz of setting spray. Hold the setting spray bottle 6-8 inches away from your face and mist a fine, even layer over your makeup. This final step helps to lock in your contour and concealer for long-lasting wear, ensuring your makeup looks fresh and flawless throughout the day. -
Touch-Up Technique:
If your contour starts to fade or lose intensity throughout the day, use a small precision brush to touch up the areas that need extra definition. Dip the brush into translucent powder and gently press it onto the faded contour, blending as needed for a seamless finish. This touch-up technique helps to revive your contour and maintain a sculpted look without having to redo your entire makeup.
EXAMPLES:
-
Daytime Radiance Look:
Achieve a fresh and luminous complexion for daytime wear by baking your contour with translucent powder. After applying your cream contour and concealer, use a fluffy brush to dust translucent powder over the contoured areas of your face, allowing it to set for 5-10 minutes before dusting off the excess. This baking technique helps to lock in your contour for long-lasting wear, ensuring your makeup stays put throughout the day. -
Evening Glamour Finish:
Elevate your evening makeup look with a flawless finish by baking your contour with translucent powder. After applying your cream contour and concealer, use a damp makeup sponge to press translucent powder into the contoured areas of your face, allowing it to set for 5-10 minutes before dusting off the excess. This baking technique helps to intensify your contour and ensure it lasts all night long, perfect for glamorous evenings and special occasions. -
Special Event Perfection:
Prepare for a special event or photo shoot with a flawless and long-lasting contour by baking with translucent powder. After applying your cream contour and concealer, use a powder puff to press translucent powder into the contoured areas of your face, allowing it to set for 5-10 minutes before dusting off the excess. This baking technique creates a sculpted and polished look that withstands the test of time, ensuring you look picture-perfect from start to finish.
PROBLEM SOLVING:
-
Cakey Texture Residue:
If baking with translucent powder leaves behind a cakey or powdery residue on the skin, use a clean makeup sponge or powder brush to gently buff away any excess powder. Start with light tapping motions to dislodge the excess product, then blend in circular motions to smooth out the texture and create a seamless finish. Finish by spritzing a hydrating setting spray over the top to melt the powder into the skin for a natural-looking glow. -
Over-Drying Sensation:
If baking with translucent powder leaves your skin feeling over-dry or tight, mist a hydrating setting spray over the top to restore moisture and refresh your complexion. Hold the setting spray bottle 6-8 inches away from your face and mist a fine, even layer over your makeup, focusing on the contoured areas. This hydrating step helps to alleviate any dryness or discomfort while setting your contour for long-lasting wear. -
Patchy Coverage Issue:
If baking with translucent powder results in patchy coverage or uneven texture, use a clean makeup sponge or brush to press translucent powder into the areas that need extra setting. Focus on the patchy areas and gently press the powder into the skin, blending as needed for a seamless finish. This targeted application helps to fix any areas of concern while ensuring your contour stays in place all day long.
Bronzer Beyond Warmth: Using Bronzer for Definition
Bronzer isn’t just for adding warmth. Explore how cool-toned bronzers can add definition and dimension to your face:
-
Slim Down a Round Face: Apply a cool-toned bronzer in the hollows of your cheeks and along the sides of your forehead to create a slimming effect. Blend the bronzer upwards and outwards for a natural look.
-
Sharpen Your Jawline: Apply a cool-toned bronzer just below your jawline and blend downwards. This helps to define your jawline and create a more sculpted appearance.
-
Define Your Nose (Optional): For a more defined nose, apply a thin line of cool-toned bronzer down the bridge of your nose. Blend the bronzer seamlessly to avoid harsh lines.
- Cool-toned Bronzer for Definition:
- Round Face: Hollows of cheeks, sides of forehead, blend upwards and outwards.
- Sharpen Jawline: Below jawline, blend downwards.
- Define Nose (Optional): Thin line down bridge, blend seamlessly.
TIPS:
-
Cool-Toned Bronzer Selection:
Opt for a cool-toned bronzer shade that is a few shades darker than your natural skin tone for a subtle and natural-looking contour. Look for bronzer formulas with a matte finish, as shimmer or sparkle can create an unnatural sheen and detract from the sculpted effect. -
Precision Application Technique:
Use a small, angled makeup brush to apply bronzer in the hollows of your cheeks and along the sides of your nose with precision. Start with a light hand and gradually build up the intensity to avoid applying too much product at once, ensuring a seamless and sculpted finish. -
Blending for Seamless Transition:
Blend bronzer seamlessly into the skin using circular motions or back-and-forth motions with a fluffy makeup brush. Pay close attention to the edges of your contour to ensure a smooth transition between the bronzer and your foundation, avoiding any harsh lines or demarcations.
TRICKS:
-
Layering Technique for Intensity:
For a more intense and sculpted contour, layer bronzer over your cream contour or powder contour. Start with a cream contour to map out the desired shape, then layer bronzer on top to add depth and dimension. Finish with a touch of translucent powder to set everything in place for long-lasting wear. -
Spot-Touching for Precision:
Use a small precision brush to spot-touch bronzer onto specific areas of your face that require extra definition. Target areas such as the hollows of your cheeks, along your jawline, and the sides of your nose to enhance your natural bone structure and create a sculpted appearance without overdoing it. -
Bronzer as Eyeshadow Transition Shade:
Extend the use of bronzer beyond your face by using it as an eyeshadow transition shade. Sweep bronzer into the crease of your eyelids with a fluffy eyeshadow brush to add warmth and dimension to your eye makeup look, creating a cohesive and polished finish.
HACKS:
-
Contouring with Powder Bronzer:
If you prefer powder products for contouring, use a matte bronzer to sculpt and define your features. Apply bronzer in the hollows of your cheeks, along your jawline, and the sides of your nose using a small angled makeup brush or fluffy powder brush. Blend thoroughly for a seamless and natural-looking contour that lasts all day. -
Bronzer for Faux Freckles:
Create natural-looking faux freckles using bronzer for a sun-kissed and youthful appearance. Dip a small precision brush into bronzer and lightly dot it onto the high points of your cheeks, nose, and forehead, concentrating on areas where the sun naturally hits your face. Use a fingertip to gently tap and blend the dots for a subtle and realistic freckled effect. -
Bronzer as Contour Base:
Use bronzer as a base for cream or liquid contour products to enhance longevity and intensity. Apply bronzer to the areas you want to contour with a fluffy makeup brush, then layer cream or liquid contour on top for added depth and dimension. Set everything in place with translucent powder for a flawless and long-lasting contour that withstands any occasion.
EXAMPLES:
-
Everyday Natural Contour:
Achieve a natural and sculpted contour for everyday wear using bronzer. Apply bronzer in the hollows of your cheeks, along your jawline, and the sides of your nose with a small angled makeup brush, blending thoroughly for a seamless finish. This everyday contouring technique enhances your natural bone structure and adds subtle definition to your face without looking overly dramatic. -
Special Occasion Glam Contour:
Elevate your makeup look for special occasions with a glamorous contour using bronzer. Apply bronzer in the hollows of your cheeks, along your jawline, and the sides of your nose with a fluffy powder brush, layering for intensity as desired. This glamorous contouring technique adds depth and dimension to your face, perfect for evenings out or events where you want to make a statement. -
Effortless Sun-Kissed Glow:
Achieve an effortless sun-kissed glow using bronzer to contour and warm up your complexion. Apply bronzer in the shape of a “3” on each side of your face, starting at your temples, sweeping under your cheekbones, and finishing along your jawline with a fluffy powder brush. This contouring technique mimics the natural shadows created by the sun, giving you a radiant and sculpted appearance with minimal effort.
PROBLEM SOLVING:
-
Patchy Bronzer Application:
If bronzer applies patchily or unevenly, use a clean makeup sponge or powder brush to blend out any harsh lines or demarcations. Start with light tapping motions to diffuse the edges of the bronzer, then blend in circular motions to smooth out the texture and create a seamless finish. Finish by lightly dusting translucent powder over the top to set everything in place for long-lasting wear. -
Over-Application of Bronzer:
If you apply too much bronzer and end up with an overly intense contour, use a clean makeup sponge or powder brush to blend out the excess product. Start with light tapping motions to disperse the bronzer, then blend in circular motions to soften the colour and create a more natural-looking finish. Finish by dusting translucent powder over the top to tone down the intensity and set your contour for a flawless finish. -
Bronzer Oxidation Issue:
If bronzer oxidizes or changes colour throughout the day, try using a primer or setting spray underneath your makeup to prevent oxidation and ensure long-lasting wear. Apply a pea-sized amount of primer to clean, moisturized skin before applying your foundation and bronzer. Finish with a spritz of setting spray over the top to lock everything in place and maintain the integrity of your makeup throughout the day.
Contouring for Different Face Shapes: Tailoring Your Technique
Every face is unique, so should your contour be! Let’s explore contouring techniques for different face shapes:
-
Oval Face: You have the most balanced face shape and can get away with minimal contouring. Apply a light bronzer or cream contour in the hollows of your cheeks and blend upwards. You can also add a touch of highlighter to your cheekbones and brow bone for extra definition.
-
Round Face: Focus on creating a slimming effect. Apply bronzer in the hollows of your cheeks, along the sides of your forehead, and just below your jawline. Blend upwards and outwards for a natural look. Highlighting your cheekbones and chin can further elongate your face.
- Contouring for Different Face Shapes:
- Oval Face: Light bronzer/cream contour in hollows of cheeks, blend upwards, highlighter on cheekbones and brow bone.
- Round Face: Bronzer in hollows of cheeks, sides of forehead, below jawline, blend upwards and outwards, highlight cheekbones and chin.
TIPS:
-
Oval Face:
If you have an oval face shape, you’re blessed with balanced proportions that require minimal contouring. Focus on enhancing your natural features with subtle contouring. Apply a light bronzer or contour shade in the hollows of your cheeks, blending upwards towards your temples. Avoid contouring the jawline or forehead excessively to maintain the natural symmetry of your face. -
Round Face:
To create the illusion of more defined cheekbones and a slimmer face, focus on contouring along the sides of your face. Apply a matte bronzer or contour shade in the hollows of your cheeks, blending upwards towards your temples to elongate the face. Contour along the hairline and jawline to add definition and minimize the appearance of roundness. -
Square Face:
If you have a square face shape with defined angles, contouring can soften your features and create a more balanced appearance. Focus on contouring the outer edges of your face to create the illusion of softer angles. Apply contour along the jawline, temples, and sides of the forehead to soften the square shape. Blend contour upwards and outwards to create a natural-looking shadow.
TRICKS:
-
Softening Sharp Angles:
For square or angular face shapes, focus on softening sharp angles with strategic contouring. Apply contour along the jawline and sides of the face to create a more rounded appearance. Use a lighter hand when contouring the forehead and temples to avoid emphasizing angular features. Blend contour seamlessly for a natural-looking finish. -
Enhancing Natural Features:
Contouring should enhance your natural features rather than completely altering them. Focus on accentuating your cheekbones, jawline, and forehead with subtle contouring techniques. Use a matte bronzer or contour shade that is only a few shades darker than your natural skin tone for a realistic shadow effect. -
Experiment with Placement:
Don’t be afraid to experiment with contour placement to find what works best for your face shape. Take note of your unique features and adjust your contouring technique accordingly. For example, if you have a prominent forehead, contour along the hairline to create the illusion of a smaller forehead. Similarly, if you have a narrow jawline, contour along the jawline to add definition and balance.
HACKS:
-
Contouring Cheat Sheet:
Create a contouring cheat sheet tailored to your face shape to guide your contouring routine. Take note of the areas you want to enhance or minimize and use this as a reference when applying contour products. Remember to blend contour seamlessly for a natural-looking finish that enhances your features without looking harsh or overdone. -
Highlighting for Balance:
Balance your contouring with strategic highlighting to create dimension and symmetry. Apply highlighter to the high points of your face, such as the tops of your cheekbones, brow bone, and Cupid’s bow, to add brightness and lift. Highlighting helps to accentuate your contour and create a more sculpted appearance. -
Practice Makes Perfect:
Contouring is a skill that takes time and practice to master, so don’t be discouraged if it doesn’t look perfect right away. Experiment with different techniques and products to find what works best for your face shape and skin type. Remember, the key to successful contouring is blending seamlessly for a natural-looking finish.
EXAMPLES:
-
Soft and Natural Contoured Look:
Achieve a soft and natural contoured look suitable for everyday wear by focusing on subtle enhancements. Use a cream contour product in a shade close to your natural skin tone to sculpt your features softly. Apply contour along the hollows of your cheeks, jawline, and temples, blending seamlessly for a natural shadow effect. Finish with a touch of highlighter for added luminosity. -
Dramatic Contoured Look:
For special occasions or evenings out, opt for a more dramatic contoured look that emphasizes your features. Use a matte bronzer or contour powder to sculpt your cheekbones, jawline, and forehead, focusing on creating strong angles. Blend contour seamlessly for a sculpted appearance, then layer on a radiant highlighter for a striking finish that catches the light. -
Subtle Contouring for Beginners:
If you’re new to contouring, start with a subtle and easy-to-achieve contoured look that enhances your natural features. Use a powder contour product in a shade slightly darker than your natural skin tone to create soft shadows along the hollows of your cheeks and jawline. Blend contour upwards and outwards for a natural-looking finish that adds subtle definition to your face shape.
PROBLEM SOLVING:
-
Over contouring:
If you’ve applied too much contour product and it looks overly dramatic or harsh, don’t panic! Use a clean makeup sponge or brush to blend out the excess product until you achieve a more natural-looking result. You can also dust translucent powder over the contoured areas to soften the effect and create a more diffused finish. -
Patchy Contouring:
If your contour appears patchy or uneven, it may be due to improper blending or application techniques. Use a clean makeup brush or blending sponge to blend out the contour product, focusing on smoothing out any uneven areas. You can also use a translucent setting powder to help blend and set the contour for a seamless finish. -
Mismatched Contour Shade:
If you’ve chosen a contour shade that doesn’t suit your skin tone or appears too dark, you can easily correct it with the right blending technique. Use a clean makeup brush or sponge to blend out the contour product, focusing on diffusing the colour and creating a more natural-looking shadow. You can also layer a lighter powder over the contour to soften the effect and create a more seamless transition.
Putting It All Together: Creating a Cohesive Contoured Look
Now that you’ve mastered the art of creative contouring, let’s learn how to put all the techniques together for a flawless, cohesive look:
-
Start with a clean, moisturized base: Apply your usual skincare routine and moisturizer to create a smooth canvas for your makeup.
-
Conceal and Correct: Use concealer to address any imperfections like dark circles or blemishes. You can also use a colour corrector to neutralize redness or hyperpigmentation.
-
Apply Foundation (Optional): For a full-coverage look, apply foundation that matches your skin tone. However, if you prefer a more natural look, you can skip this step.
-
Contour and Highlight: This is where the magic happens! Use the techniques you learned in this guide to contour and highlight your face. Remember to start with a light hand and build up the intensity gradually.
-
Set Your Makeup: Apply translucent setting powder to lock everything in place and prevent your makeup from creasing.
-
Blush and Bronzer (Optional): Apply blush to the apples of your cheeks for a touch of colour. You can also use bronzer for a sun-kissed look, but be mindful not to overdo it after contouring.
-
Finish with Brows, Eyes, and Lips: Complete your look by filling in your brows, applying eyeshadow and eyeliner (optional), and finishing with your favourite lipstick or lip gloss.
TIPS:
-
Start with a Clean Canvas:
Begin by cleansing and moisturizing your face to create a smooth base for makeup application. Use a gentle cleanser to remove any dirt, oil, or impurities from your skin, then follow up with your favourite moisturizer to hydrate and nourish your complexion. Allow the moisturizer to absorb fully before proceeding with makeup application to ensure a flawless finish. -
Prep with Primer:
Apply a primer suitable for your skin type to create a smooth and long-lasting base for your makeup. Choose a primer that addresses your specific concerns, whether it’s minimizing pores, controlling oil, or extending the wear of your makeup. Gently massage the primer into your skin using upward motions until it’s evenly distributed, then allow it to set for a few minutes before applying foundation. -
Choose the Right Foundation:
Select a foundation that matches your skin tone and type for a seamless and natural-looking finish. Consider factors such as coverage, finish, and formula to find the perfect foundation for your needs. Apply foundation using your preferred method, whether it’s with a makeup brush, sponge, or fingertips, blending it evenly across your face and neck for uniform coverage.
TRICKS:
-
Mix and Match Formulas:
Experiment with mixing different foundation formulas to customize the coverage and finish of your base. For example, mix a matte foundation with a luminous primer for a natural satin finish, or blend a lightweight tinted moisturizer with a full-coverage foundation for a sheer yet flawless complexion. Adjust the ratios according to your preferences to achieve your desired look. -
Spot Concealing for Precision:
Use a concealer that matches your skin tone to spot-conceal any blemishes, dark spots, or imperfections for a flawless complexion. Apply concealer directly onto areas that require extra coverage, such as under-eye circles, acne scars, or redness, and gently blend it into the surrounding skin using a makeup sponge or fingertip for a seamless finish. -
Set with Translucent Powder:
Lock your foundation and concealer in place with a light dusting of translucent powder to prevent creasing and extend the wear of your makeup. Use a fluffy powder brush to apply a small amount of powder to areas prone to excess shine, such as the T-zone, under-eye area, and chin, blending it outwards for a natural finish that won’t look cakey or heavy.
HACKS:
-
Customize Your Coverage:
Adjust the coverage of your foundation and concealer by layering thin, buildable layers until you achieve your desired level of coverage. Start with a sheer layer of foundation all over your face, then spot-conceal any areas that require extra coverage before setting everything in place with translucent powder. This customizable approach allows you to tailor your base makeup to your specific needs and preferences. -
Set Foundation with Setting Spray:
Lock your foundation in place and add a natural dewy finish to your complexion by spritzing setting spray all over your face. Hold the setting spray bottle at arm’s length from your face and mist it evenly across your skin in a circular motion, allowing it to dry fully before proceeding with the rest of your makeup. Setting spray helps to prolong the wear of your makeup and prevents it from transferring or fading throughout the day. -
Blotting Paper for Touch-Ups:
Keep blotting paper on hand for quick touch-ups throughout the day to absorb excess oil and shine without disturbing your makeup. Gently press a sheet of blotting paper onto areas prone to oiliness, such as the forehead, nose, and chin, to mattify the skin and refresh your complexion instantly. Blotting paper is a portable and convenient solution for maintaining a matte and shine-free finish on the go.
EXAMPLES:
-
Everyday Natural Makeup Look:
Create a fresh and natural makeup look for everyday wear using lightweight and breathable products. Start by applying a sheer layer of tinted moisturizer or BB cream to even out your skin tone, then spot-conceal any blemishes or imperfections with a creamy concealer. Set your base makeup with translucent powder for a matte finish that lasts all day, then add a touch of blush and lip balm for a healthy flush of colour. -
Glamorous Evening Makeup Look:
Elevate your makeup look for special occasions or evenings out with a glamorous and polished makeup look. Begin by applying a full-coverage foundation and concealer to create a flawless complexion, then contour and highlight your features for added dimension and glow. Define your eyes with smoky eyeshadow and winged eyeliner, then finish with a bold lip colour for a statement-making finish that turns heads. -
Natural “No-Makeup” Makeup Look:
Achieve a natural “no-makeup” makeup look that enhances your features without looking overly done. Start with a lightweight foundation or tinted moisturizer to even out your skin tone, then spot-conceal any imperfections with a lightweight concealer. Define your brows with a tinted brow gel, add a coat of mascara to your lashes, and finish with a sheer lip tint or gloss for a subtle yet polished finish that enhances your natural beauty.
PROBLEM SOLVING:
-
Foundation Oxidation Issue:
If your foundation oxidizes or changes colour throughout the day, try switching to a different formula or shade that is less prone to oxidation. Opt for oil-free and long-wearing formulas that are specifically designed to resist oxidation and maintain their true colour throughout the day. Additionally, using a primer or setting spray underneath your foundation can help to prevent oxidation and ensure long-lasting wear. -
Cakey Foundation Appearance:
If your foundation looks cakey or heavy on the skin, try adjusting your application technique and using less product to achieve a more natural-looking finish. Use a damp makeup sponge or stippling brush to apply foundation in thin, buildable layers, focusing on areas that require coverage while avoiding over-application. Set your foundation with translucent powder to mattify the skin and prevent excess shine without adding extra texture or weight. -
Patchy Foundation Application:
If your foundation applies patchily or unevenly, try exfoliating and moisturizing your skin beforehand to create a smooth canvas for makeup application. Use a gentle exfoliator to remove any dead skin cells and impurities, then follow up with a hydrating moisturizer to plump and nourish your skin. Allow the moisturizer to absorb fully before applying foundation to ensure a seamless and flawless application.
Remember:
- Practice makes perfect! Don’t be discouraged if you don’t get it right the first time. Keep practicing and experimenting until you find techniques that work best for you.
- There are no hard and fast rules! The most important thing is to create a look that makes you feel confident and beautiful.
Embrace your individuality and let your inner artist shine through with creative contouring!
You’ll Also Love:
Best Foundation for Mature Skin: 5 Formulas That Don’t Settle Into Fine Lines
How to Do Winged Eyeliner: The Foolproof Method That Works on Every Eye Shape
I Turned 43 and My Makeup Stopped Working: The 5 Products That Finally Restored My Glow
How to Contour for Your Face Shape (2026 Guide)